How Do You Export Drone Videos?
Figuring out how to export drone videos can feel like a puzzle, especially when you want your footage to look its best wherever it's going. You've captured some amazing aerial shots, but getting them from your drone's memory card to a shareable format that preserves quality requires knowing a few key settings. It's all about striking that right balance between visual fidelity and manageable file sizes.
In our research, we found that the typical drone records in a format like H.264, often within an MP4 container. For professional workflows or archiving, a higher-quality codec like ProRes might be considered, but for most sharing purposes, optimizing your H.264 or H.265 (HEVC) export is the primary goal. This guide will walk you through the essential steps and considerations so your drone footage shines.
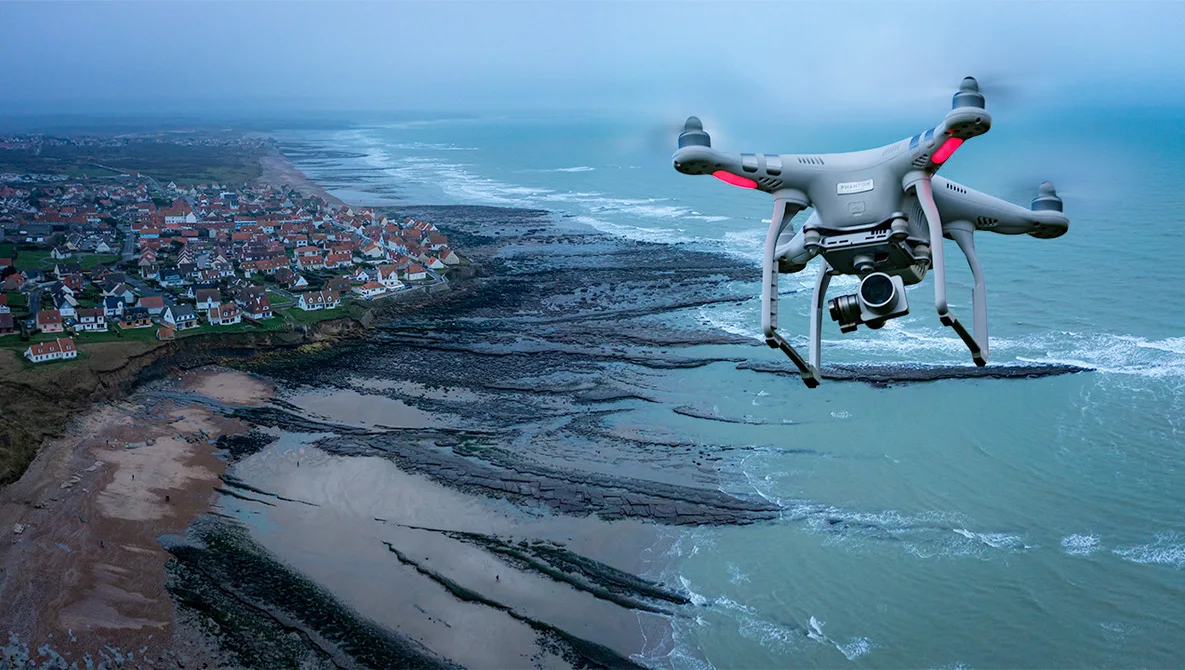
Image source: Bing (Web (fair-use with source credit))
Quick Answer
To export drone videos, select appropriate settings in your editing software for resolution, frame rate, and codec like H.264. Match these to your final destination, whether it's social media or professional use. Pay attention to bitrate to balance quality and file size.
Avoid common export mistakes to prevent pixelation and loss of detail.
Setting Up Your Export Workflow: Software and Settings
When you're ready to turn those raw drone clips into something polished, the first big decision is your video editing software. This is where you'll actually perform the export. The choices you make here directly impact the quality, file size, and compatibility of your final video.
Choosing the Right Video Editing Software
Your editing software is your command center for transforming raw footage. Different programs offer varying levels of complexity, features, and export options, making the choice important for your workflow.
- Professional-Grade Software: Think Adobe Premiere Pro, Final Cut Pro, or DaVinci Resolve. These offer the most control over every export parameter. You can fine-tune codecs, bitrates, color spaces, and more, giving you maximum flexibility for high-end projects. They generally have a learning curve but are essential for serious filmmaking or broadcast work.
- Consumer/Prosumer Software: Options like iMovie (Mac/iOS) or CapCut (mobile/desktop) are much more user-friendly. They provide streamlined export presets optimized for common platforms like YouTube or Instagram. While they offer less granular control, their simplicity makes them ideal for quick edits and social sharing.
- Manufacturer Software: Some drone manufacturers offer their own basic editing apps. These are often very simple, primarily for quick trims and direct sharing from your mobile device. They're convenient but lack the depth for complex edits or specific export requirements.
The key is to pick software that matches your skill level and your project's needs. If you're just starting, a free or low-cost option with good presets can be a great way to learn the basics of exporting.
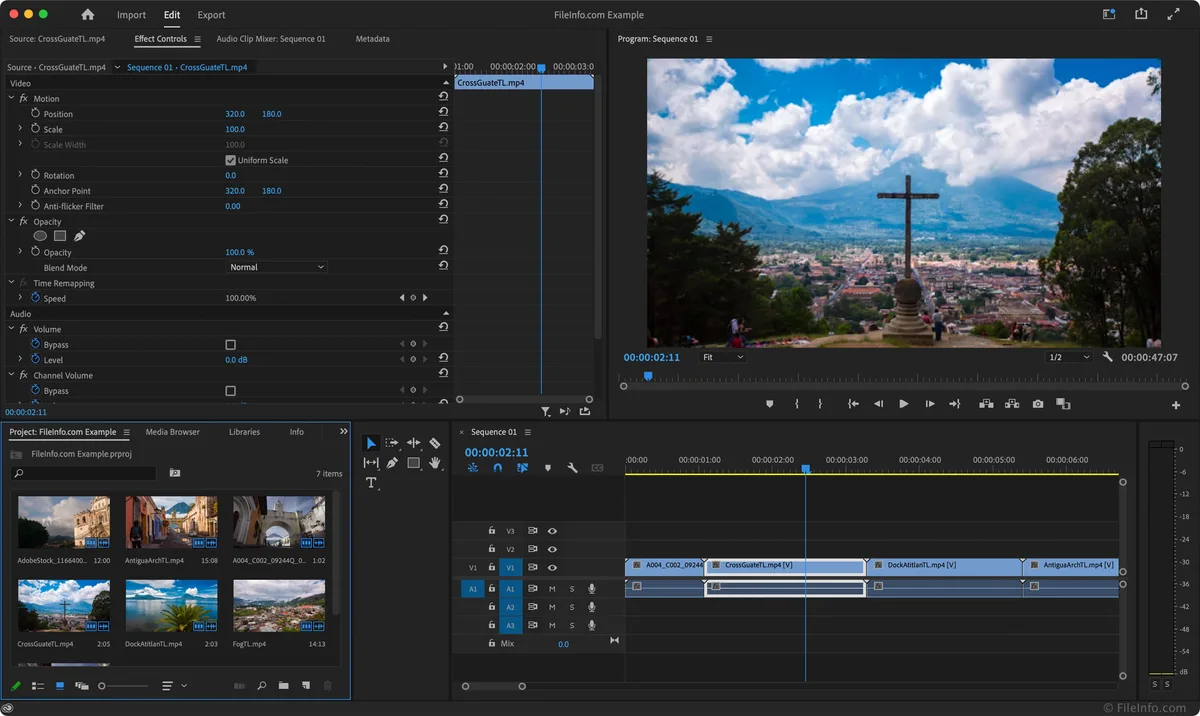
Image source: Bing (Web (fair-use with source credit))
Navigating Export Settings: Codecs, Containers, and Quality
Once you've chosen your software, you'll encounter a sea of settings. Don't let them overwhelm you. The most critical are the codec and the container, which dictate how your video data is compressed and packaged.
- Codec (Coder-Decoder): This is the algorithm used to compress and decompress your video. Common codecs include H.264 and H.265 (also known as HEVC, High Efficiency Video Coding). H.265 is more efficient, meaning it can achieve similar quality to H.264 at a smaller file size, but it requires more processing power to encode and decode. ProRes is a less compressed, higher-quality codec often used for editing or archiving, resulting in very large files.
- Container: This is the "wrapper" that holds your video and audio streams. The most common containers are MP4 and MOV. Most modern platforms and software support MP4, making it a universally safe choice for sharing. MOV files are often associated with Apple's ecosystem and ProRes codecs.
Getting these right ensures your video plays smoothly and retains as much of its original quality as possible.
Mastering Resolution, Frame Rate, and Bitrate
These three settings are the pillars of your video's visual quality. They determine how sharp, smooth, and detailed your final footage will be. Understanding them is crucial for making informed export decisions.
Selecting the Best Frame Rate for Smoothness
Frame rate, measured in frames per second (fps), dictates how many still images are displayed per second to create the illusion of motion. Common rates for drone video include:
- 24fps: This is the standard for cinematic film. It provides a classic, slightly more "film-like" motion blur. Great for narrative content, landscapes, and anything aiming for a cinematic feel.
- 30fps: This is the standard for television broadcasting and many online platforms. It offers a smoother motion than 24fps and is a good all-around choice.
- 60fps (or higher): This provides very smooth motion, ideal for capturing fast action, sports, or when you plan to slow down footage for a slow-motion effect in post-production. If your drone shoots at 60fps, exporting at 60fps will preserve that smoothness.
When choosing your export frame rate, it's generally best to match the frame rate of your original footage if possible. If you change it, you might notice jerky motion or unnatural-looking slow-motion. For instance, exporting 60fps footage at 30fps will mean half your frames are discarded, potentially leading to choppier results unless deliberately intended for stylistic reasons.
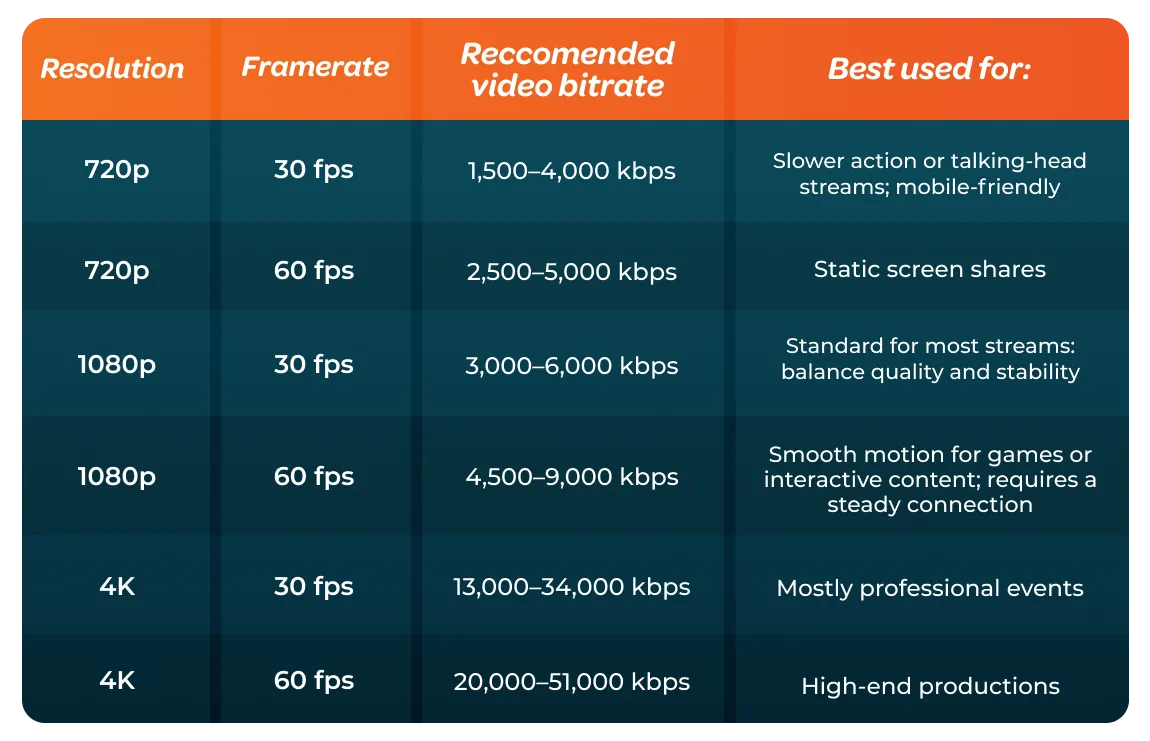
Image source: Bing (Web (fair-use with source credit))
Matching Resolution to Your Needs
Resolution refers to the number of pixels in each frame of your video. Higher resolution means more detail, but also larger file sizes and greater processing demands.
- 1080p (Full HD): This is 1920 pixels wide by 1080 pixels tall. It's still a very common standard, especially for social media and many websites, offering a good balance of quality and file size.
- 4K (UHD): This is typically 3840 pixels wide by 2160 pixels tall. It offers significantly more detail than 1080p, making it excellent for larger screens, professional use, or when you might need to crop or zoom into your footage in post-production without losing much quality. Most modern drones shoot in 4K.
- 8K: Much less common and requires substantial processing power and storage. It's generally overkill for most online sharing but offers incredible detail for very specific, high-end productions.
When exporting, consider where your video will be viewed. If it's primarily for mobile devices or standard web viewing, 1080p might suffice. For cinematic quality or content intended for larger displays, 4K is often the better choice, provided your original footage was captured at that resolution.
Optimizing Bitrate for Quality and File Size
Bitrate is perhaps the most misunderstood, yet critical, setting for exporting video. It directly impacts how much data is used to represent each second of your video. Think of it as the "density" of visual information.
Understanding Variable vs. Constant Bitrate
- Variable Bitrate (VBR): VBR adjusts the bitrate on the fly. It uses more data for complex scenes with lots of action and detail, and less data for simpler, static scenes. This is generally more efficient, leading to better quality for a given file size. Most editing software defaults to VBR, often with a target bitrate and a maximum bitrate.
- Constant Bitrate (CBR): CBR uses the same amount of data for every single second of video, regardless of complexity. This can be useful for streaming services that require predictable data rates, but it's often less efficient for general export, potentially leading to larger files with no discernible quality improvement over VBR.
For most users, especially those exporting for platforms like YouTube or social media, VBR is the preferred choice. It allows the software to allocate resources where they're most needed, resulting in a better-looking video without unnecessarily inflating the file size.
Finding the Sweet Spot for Platforms
The "sweet spot" for bitrate depends entirely on your target platform and desired resolution. Higher bitrates mean better quality but larger files and longer export times. Lower bitrates mean smaller files but can lead to visible compression artifacts, like blockiness or a loss of fine detail, especially in fast-moving scenes or gradients.
Here are some general recommendations based on common platforms and resolutions:
- YouTube (4K @ 30fps): Recommend a VBR bitrate of 35-68 Mbps (Megabits per second).
- YouTube (1080p @ 30fps): Recommend a VBR bitrate of 8-12 Mbps.
- Instagram (Reels/Feed, 1080p @ 30fps): Recommend a VBR bitrate of 3-5 Mbps.
- Vimeo (1080p @ 30fps): Recommend a VBR bitrate of 10-15 Mbps.
Note: These are general guidelines. Always check the latest recommendations from the platform you're uploading to, as they can change.
If you export with a bitrate that's too low, your footage might look "crunchy" or have muddy colors. If it's too high, the file size will be unnecessarily large, and some platforms might even re-compress it anyway, negating your efforts.
Exporting for Specific Platforms: Social Media vs. Professional Projects
The intended destination for your drone video is a major factor in determining the best export settings. A video optimized for a quick Instagram Reel will have very different requirements than one destined for a documentary or broadcast.
YouTube and Social Media Best Practices
For platforms like YouTube, Instagram, Facebook, and TikTok, the goal is usually a good balance of visual quality and an acceptable file size that allows for quick uploads and smooth playback on various devices.
- Resolution: Match your source footage if possible, but 1080p or 4K are standard.
- Frame Rate: Stick to 24, 30, or 60fps, matching your source.
- Codec: H.264 is almost universally supported and recommended. H.265 (HEVC) is also supported by many platforms but might not offer significant advantages for short social clips and could potentially cause compatibility issues on older devices.
- Bitrate: Use the platform-specific recommendations mentioned earlier. For social media, a slightly lower bitrate is often acceptable because the playback environment (often mobile) is less demanding. For YouTube, aiming for the higher end of the recommended range for your resolution and frame rate will give you the best visual result after their compression.
- Container: MP4 is the most reliable container for social media uploads.
Many editing applications have presets specifically for "YouTube 1080p" or "Instagram," which can simplify this process considerably. Use these as a starting point, but be prepared to tweak them if the results aren't quite what you want.
Professional Editing & Archiving Considerations
If your drone footage is part of a larger professional video project, or if you plan to archive it for future high-quality use, your export strategy changes.
- Editing Masters: When exporting footage to be re-imported into a professional editing suite (like Premiere Pro or DaVinci Resolve) for further color grading or effects work, you'll want to preserve as much quality as possible. This often means using less compressed codecs like Apple ProRes (if you're on a Mac or using software that supports it) or high-bitrate H.264/H.265. File sizes will be significantly larger.
- Archival: For long-term storage, you have a few options. You could archive the original drone footage as-is, or export to a professional editing codec. Increasingly, some professionals are archiving in high-quality H.265 due to its efficiency. The key is to ensure the format you choose will remain compatible and accessible in the future. Manufacturer specifications from brands like DJI often detail their native recording formats and recommended post-production workflows.
For professional projects, it's common to export a "master" file with minimal compression, and then create separate, optimized versions for different delivery platforms (web, broadcast, etc.) from that master.
Common Drone Video Export Mistakes and How to Fix Them
Even with the best intentions, it's easy to stumble when exporting drone videos. Most issues boil down to a misunderstanding of how the settings affect the final output. Here's a look at some common pitfalls and how to avoid them.
- Exporting at a Lower Resolution than Source: If your drone shot in 4K, but you export at 1080p without scaling properly, you're essentially throwing away detail. Always try to export at the same resolution as your source footage, or a universally accepted standard like 4K or 1080p if your source is higher. If you must export at a lower resolution, ensure your editing software has a good scaling algorithm to minimize quality loss.
- Using Too Low a Bitrate: This is a big one for social media. If you’re seeing blocky artifacts, especially in skies or areas with fine detail, your bitrate is likely too low for the resolution and complexity of your footage. Increase the target bitrate in your export settings. For example, if exporting 1080p at 8 Mbps looks bad, try 12-15 Mbps.
- Incorrect Frame Rate Settings: Exporting 60fps footage at 30fps without properly understanding the implications can lead to unnatural motion. If you want smooth motion or slow-motion capability, export at the original frame rate. If you are intentionally slowing footage down, make sure your editing software handles the frame rate conversion smoothly.
- Ignoring Color Space: Some drones record in flat color profiles (like D-Log) to capture maximum dynamic range. If you export directly without color correction or grading, the footage will look washed out. Always color correct or grade your footage before exporting to a standard color space like Rec. 709, which is the most common for web and broadcast.
- Not Checking Platform Requirements: Platforms have specific guidelines for video uploads. Uploading a video that doesn't meet these (e.g., wrong aspect ratio for Instagram Stories, or exceeding file size limits for some platforms) can lead to poor quality or rejected uploads. Always consult the platform's help pages for their latest recommendations.
Fixing these often involves going back to your editing software and adjusting the export settings before rendering again. It’s better to do a few test exports to find the sweet spot than to render a lengthy video only to discover it's not up to par.
Frequently Asked Questions About Exporting Drone Footage
What's the best codec for exporting drone videos?
For most sharing online, H.264 is the best all-around codec due to its widespread compatibility and good balance of quality and file size. For higher quality and smaller files, H.265 (HEVC) is a more efficient option if your editing software and target platforms support it. For professional editing or archiving, consider ProRes.
How do I reduce the file size of my drone videos?
You can reduce file size by lowering the bitrate, exporting at a lower resolution (like 1080p instead of 4K), using a more efficient codec like H.265, or reducing the frame rate if motion smoothness isn't critical.
Why does my exported video look pixelated or blocky?
This usually means your bitrate is too low for the resolution and complexity of your footage. Increase the target bitrate in your export settings. Also, ensure you haven't accidentally exported at a much lower resolution than your source footage.
Can I export directly from my drone?
Most drones don't have built-in export functionality. You typically need to transfer the footage to a computer or mobile device and use video editing software to edit and export your videos. Some drone apps offer basic editing and sharing features, but they are not full export solutions.
How long does it take to export drone videos?
Export times vary greatly depending on your computer's processing power, the video's resolution, frame rate, bitrate, and length, as well as the complexity of your edits. A short 4K clip might take minutes on a powerful machine, while a longer, more complex project could take hours.
Your Drone Video Export Decision Guide
Deciding on the right export settings boils down to a simple question: where will this video live? Your answer dictates everything from codec choice to bitrate. Think of it as a workflow decision tree.
Here’s how to break it down:
- If your video is for social media (YouTube, Instagram, TikTok): Prioritize H.264 codec and MP4 container. Match resolution to your source or target platform standard (1080p or 4K). Use platform-recommended bitrates, often in the 8-68 Mbps range for YouTube, and lower for others. Aim for 30fps or 60fps depending on your source footage and desired smoothness.
- If your video is for professional editing or archiving: Consider higher-quality, less compressed codecs like Apple ProRes or high-bitrate H.265. Maintain original resolution and frame rate. File sizes will be large, but this preserves maximum quality for further manipulation or long-term storage.
- If you’re unsure or want broad compatibility: H.264 in an MP4 container at 1080p resolution and 30fps with a moderate bitrate (around 10-15 Mbps) is a safe bet for most situations.
Always test a short clip with your chosen settings before rendering a long video to ensure the results are what you expect. This saves time and avoids disappointment.
Your Drone Video Export Decision Guide
Deciding on the right export settings boils down to a simple question: where will this video live? Your answer dictates everything from codec choice to bitrate. Think of it as a workflow decision tree.
Here’s how to break it down:
- If your video is for social media (YouTube, Instagram, TikTok): Prioritize H.264 codec and MP4 container. Match resolution to your source or target platform standard (1080p or 4K). Use platform-recommended bitrates, often in the 8-68 Mbps range for YouTube, and lower for others. Aim for 30fps or 60fps depending on your source footage and desired smoothness.
- If your video is for professional editing or archiving: Consider higher-quality, less compressed codecs like Apple ProRes or high-bitrate H.265. Maintain original resolution and frame rate. File sizes will be large, but this preserves maximum quality for further manipulation or long-term storage.
- If you’re unsure or want broad compatibility: H.264 in an MP4 container at 1080p resolution and 30fps with a moderate bitrate (around 10-15 Mbps) is a safe bet for most situations.
Always test a short clip with your chosen settings before rendering a long video to ensure the results are what you expect. This saves time and avoids disappointment.
Your Drone Video Export Decision Guide
Deciding on the right export settings boils down to a simple question: where will this video live? Your answer dictates everything from codec choice to bitrate. Think of it as a workflow decision tree.
Here’s how to break it down:
- If your video is for social media (YouTube, Instagram, TikTok): Prioritize H.264 codec and MP4 container. Match resolution to your source or target platform standard (1080p or 4K). Use platform-recommended bitrates, often in the 8-68 Mbps range for YouTube, and lower for others. Aim for 30fps or 60fps depending on your source footage and desired smoothness.
- If your video is for professional editing or archiving: Consider higher-quality, less compressed codecs like Apple ProRes or high-bitrate H.265. Maintain original resolution and frame rate. File sizes will be large, but this preserves maximum quality for further manipulation or long-term storage.
- If you’re unsure or want broad compatibility: H.264 in an MP4 container at 1080p resolution and 30fps with a moderate bitrate (around 10-15 Mbps) is a safe bet for most situations.
Always test a short clip with your chosen settings before rendering a long video to ensure the results are what you expect. This saves time and avoids disappointment.
Your Drone Video Export Decision Guide
Deciding on the right export settings boils down to a simple question: where will this video live? Your answer dictates everything from codec choice to bitrate. Think of it as a workflow decision tree.
Here’s how to break it down:
- If your video is for social media (YouTube, Instagram, TikTok): Prioritize H.264 codec and MP4 container. Match resolution to your source or target platform standard (1080p or 4K). Use platform-recommended bitrates, often in the 8-68 Mbps range for YouTube, and lower for others. Aim for 30fps or 60fps depending on your source footage and desired smoothness.
- If your video is for professional editing or archiving: Consider higher-quality, less compressed codecs like Apple ProRes or high-bitrate H.265. Maintain original resolution and frame rate. File sizes will be large, but this preserves maximum quality for further manipulation or long-term storage.
- If you’re unsure or want broad compatibility: H.264 in an MP4 container at 1080p resolution and 30fps with a moderate bitrate (around 10-15 Mbps) is a safe bet for most situations.
Always test a short clip with your chosen settings before rendering a long video to ensure the results are what you expect. This saves time and avoids disappointment.
Your Drone Video Export Decision Guide
Deciding on the right export settings boils down to a simple question: where will this video live? Your answer dictates everything from codec choice to bitrate. Think of it as a workflow decision tree.
Here’s how to break it down:
- If your video is for social media (YouTube, Instagram, TikTok): Prioritize H.264 codec and MP4 container. Match resolution to your source or target platform standard (1080p or 4K). Use platform-recommended bitrates, often in the 8-68 Mbps range for YouTube, and lower for others. Aim for 30fps or 60fps depending on your source footage and desired smoothness.
- If your video is for professional editing or archiving: Consider higher-quality, less compressed codecs like Apple ProRes or high-bitrate H.265. Maintain original resolution and frame rate. File sizes will be large, but this preserves maximum quality for further manipulation or long-term storage.
- If you’re unsure or want broad compatibility: H.264 in an MP4 container at 1080p resolution and 30fps with a moderate bitrate (around 10-15 Mbps) is a safe bet for most situations.
Always test a short clip with your chosen settings before rendering a long video to ensure the results are what you expect. This saves time and avoids disappointment.