How Do You Add Transitions to Drone Footage?
You've captured some breathtaking aerial shots with your drone, but cutting from one clip to the next can sometimes feel jarring. Learning how to add transitions to drone footage is key to making your videos flow smoothly and look professionally edited. These visual bridges connect your scenes, guiding your viewer's eye and enhancing the overall storytelling of your aerial cinematography.
This guide breaks down the process, showing you exactly what to look for and how to implement effective transitions. We’ll cover everything from the basic mechanics in your editing software to advanced tips for creating a polished final product. As of 2026, software like Adobe Premiere Pro offers a robust library of transitions, with many professional editors relying on effects that maintain a visual flow consistent with industry standards, such as those outlined by the Society of Motion Picture and Television Engineers (SMPTE) for digital video.
Quick Answer
To add transitions to drone footage, you'll use video editing software. Place your clips on the timeline, select a transition from the software's library, and drag it onto the cut point between clips. Adjust the transition's duration and settings to match your desired pace and mood.
Why Visuals Matter for Drone Transitions
When you're editing drone footage, the visual aspect of transitions is paramount. It's not just about connecting two clips; it’s about how that connection feels and looks to your audience. A well-chosen transition can enhance the emotional impact of your shots, while a poor one can completely derail the viewer's experience.
The Impact of Smooth Editing
Smooth editing, powered by effective transitions, keeps your audience engaged. Think of it like a conversation; you wouldn't interrupt someone mid-sentence. Transitions act as polite handoffs between scenes in your video.
They prevent abrupt jumps that can disorient the viewer, allowing them to follow the narrative or appreciate the visual journey without distraction. Aggregate reviews from video editing forums indicate that poorly executed transitions are a common mark of amateur content, often leading to viewers clicking away within seconds.
Seeing is Believing: What to Look For
Understanding transitions means seeing them in action. This is where visual examples are crucial. You need to observe how a dissolve softens a time jump, how a wipe can reveal new information dramatically, or how a subtle push can maintain momentum.
It's about understanding the visual language. For instance, a slow fade to black signals a definitive end, whereas a quick cross-dissolve might suggest a seamless passage of time or a change in perspective that doesn’t require a hard stop.
Core Explanation: How Transitions Blend Drone Clips
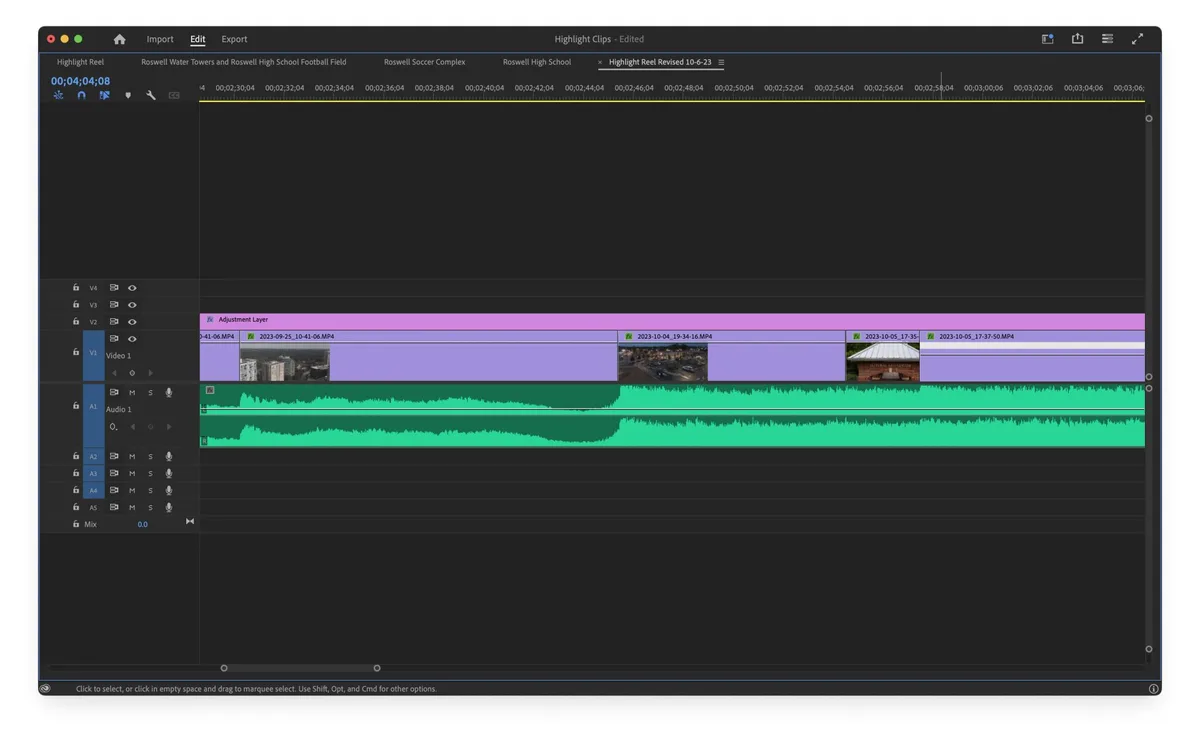
At its heart, adding a transition is a technique within video editing software designed to smooth the connection between two separate video clips. Instead of an immediate cut, a transition creates a visual effect that bridges the end of one clip and the beginning of the next. This blending process is managed within the digital editing timeline.
Understanding the Editing Timeline
Your editing timeline is the control center for your video project. Here, you lay out your clips in sequence, arranging them precisely. Each clip appears as a block on this timeline.
The points where one block ends and the next begins are called "edit points" or "cuts." Transitions are applied specifically to these edit points, creating a visual effect that occupies a small portion of both clips.
The Mechanics of Applying Transitions
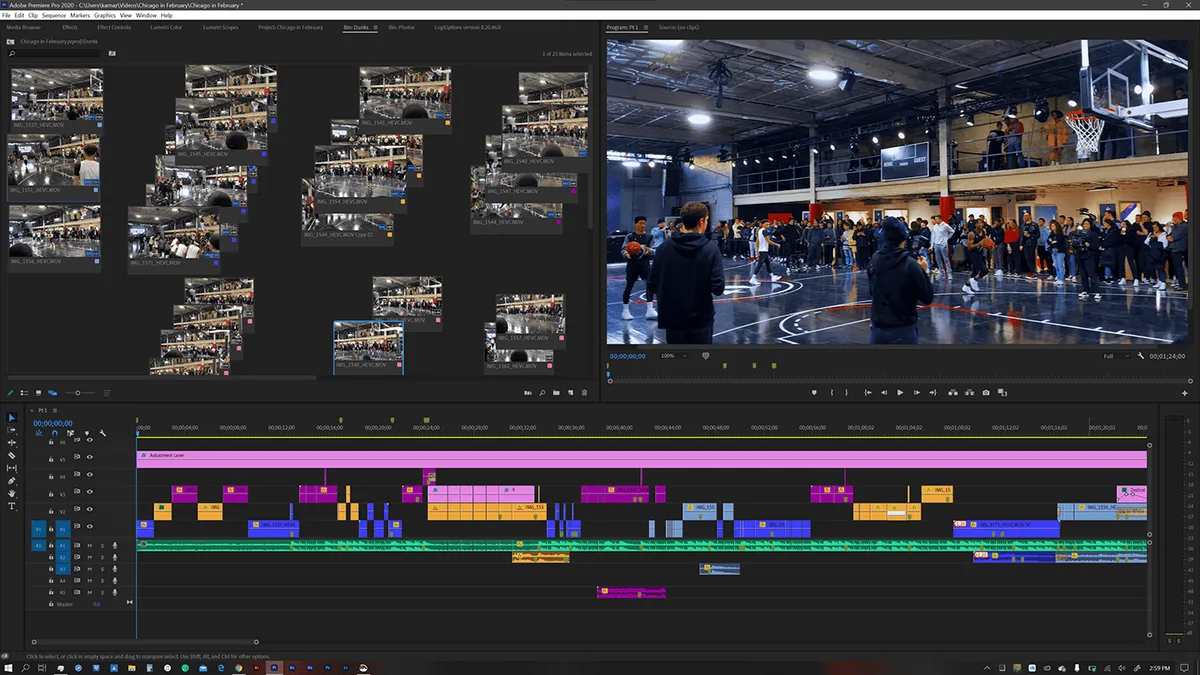
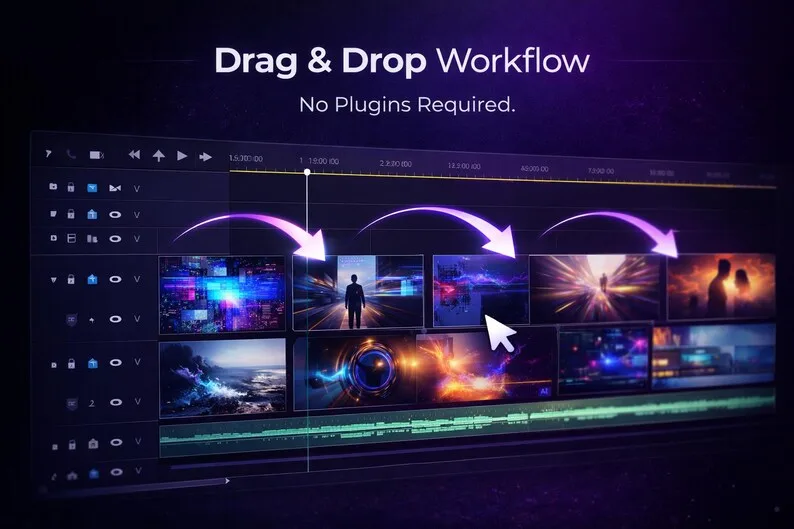
The actual application of a transition typically involves selecting a desired effect from your video editing software's built-in library. These effects, like fades, wipes, or dissolves, are then dragged and dropped onto the edit point between your clips. Once applied, you can often adjust parameters such as duration (how long the transition lasts, typically measured in frames or seconds), direction, or specific visual attributes to fine-tune its appearance and impact on the flow of your drone footage.
Common Drone Footage Transitions and Their Uses
The type of transition you choose can drastically alter the mood and pacing of your drone footage. Recognizing when to use each effect is key to professional editing.
Subtle Transitions: Fades and Dissolves for Serenity
Fades and dissolves are the workhorses of subtle transitions.
- Fade to Black/White: This is like a gentle pause button for your video. The first clip gradually disappears into a solid color (usually black), and the next clip emerges from it. It’s ideal for signaling the end of a major scene, a significant passage of time, or a moment of reflection.
- Cross Dissolve: Here, the end of one clip and the beginning of the next fade into each other simultaneously. It creates a soft, blended effect that suggests a smooth continuation or a subtle shift. This works wonders for linking shots where time has passed but the location is the same, or when you want to connect thematic elements without an abrupt break.
Dynamic Transitions: Wipes and Pushes for Energy
When your footage calls for more energy or a bolder statement, wipes and pushes are excellent choices.
- Wipes: A wipe involves a line or shape that moves across the screen, revealing the next clip as it travels. Think of a door opening or a curtain drawing back. You can customize the direction and pattern, making them great for more energetic sequences or when you want to draw a clear, defined separation between shots.
- Pushes: Similar to wipes, a push transition involves one clip literally sliding the previous clip off the screen. This creates a sense of motion and can be used to link dynamic action or to convey a forward momentum in your narrative.
Creative Transitions: Zooms and Specialty Effects
For a more stylized or modern feel, creative transitions can add flair.
- Zoom Transitions: These simulate a quick zoom out of the first clip and a corresponding zoom into the next. They’re fantastic for linking shots that have a similar focal point or when you want to create a sense of rapid progression or discovery.
- Specialty Effects: Many editing programs offer a variety of more complex transitions, like glitch effects, light leaks, or animated overlays. These can add a high-energy, contemporary feel, but should be used judiciously to avoid overwhelming the viewer.
Step-by-Step: Applying Transitions in Your Editor
Getting started with transitions in your video editing software is straightforward, but refining them is where the real magic happens.
Preparing Your Drone Clips
Before you even think about transitions, lay out your drone footage clips on the editing timeline in the order you want them to appear. Trim each clip to its essential content, removing any shaky starts or unnecessary lingering at the end. Ensure the exact point where one clip should end and the next begin is clearly defined.
This precise cut point is where your transition will be applied.
Applying and Adjusting Transitions
- Locate the Transition Library: In your video editing software, find the panel or menu dedicated to "Transitions" or "Effects."
- Select a Transition: Browse through the available options, fades, dissolves, wipes, pushes, etc.
- Drag and Drop: Click on the desired transition and drag it directly onto the cut point between two clips on your timeline.
- Adjust Duration: Once applied, the transition will appear as a small element overlapping the two clips. Most software allows you to drag the edges of this transition element to change its length. A shorter duration means a faster transition, while a longer one creates a slower, more gradual effect.
- Fine-Tune Settings: Double-click the transition on the timeline or select it and go to the "Effect Controls" panel. Here, you can often change direction (e.g., push left-to-right), modify colors, or adjust other specific attributes depending on the transition type.
Refining Transition Timing and Feel
The final step is crucial for a polished look. Play back the section of your timeline with the applied transition multiple times. Does it feel too fast?
Too slow? Does the chosen transition match the mood of the footage it connects? Adjust the duration and settings until it feels seamless.
For example, a transition connecting a wide aerial landscape to a close-up of a landmark might benefit from a slightly longer dissolve to allow the viewer to appreciate both elements before moving on.
Mistakes to Avoid with Drone Video Transitions
Even experienced editors can fall into transition traps. Recognizing these common errors can help you avoid them and keep your drone footage looking polished.
The Pitfalls of Overuse
The most common mistake is simply using too many transitions, or employing them at every single cut. This creates a dizzying, unprofessional effect that distracts from your aerial visuals. Every transition should serve a clear purpose, to smoothly connect scenes, indicate a passage of time, or add a specific mood.
If you find yourself applying a transition to almost every edit, consider whether a clean cut would be more effective. Aggregate user feedback indicates that excessive transitions are a top detractor from viewer engagement in online videos.
Mismatching Transitions to Mood
Another frequent error is selecting a transition that clashes with the tone of the footage. A hyperactive, glitchy transition might be out of place when showcasing serene landscapes. Conversely, a slow fade to black can drag down an otherwise high-energy action sequence.
Your transitions should always enhance, not undermine, the emotional impact of your drone shots. If your footage is peaceful, use gentle transitions. If it's exciting, use something more dynamic.
When a Clean Cut is Better
Sometimes, the most professional and impactful transition is no transition at all, just a clean cut. This means one clip ends abruptly, and the next begins instantly. Clean cuts are incredibly effective when two clips are closely related in time, location, or action, and don’t require a visual bridge.
If a transition doesn’t serve a specific storytelling purpose, a clean cut often preserves the pacing and directness of your drone footage much better than an unnecessary effect.
Expert Tips for Polished Drone Footage
Elevating your drone footage from simply aerial shots to compelling visuals involves thoughtful editing. Transitions are a key part of this refinement process.
Matching Transitions to Your Story
Every element in your video should serve the narrative or the overall feeling you’re aiming for. When selecting a transition, ask yourself: What story am I telling with this sequence? If you’re documenting a journey, a series of subtle cross-dissolves might effectively show the passage of miles.
If you’re building excitement for an event, a more dynamic push or wipe could be more appropriate. Consider the emotional arc and use transitions to guide the viewer through it.
Using Transitions to Enhance Pace
The duration of your transitions directly impacts the perceived pace of your video. Longer transitions (e.g., a slow fade) naturally slow things down, creating a sense of reflection or transition. Shorter transitions (e.g., a quick push) maintain energy and keep the momentum high.
By consciously adjusting transition lengths, you can manipulate the viewer's experience of time and urgency within your drone footage. For instance, during a scenic overview, a 1-second dissolve feels appropriate, while a fast-paced action montage might use transitions as short as 0.5 seconds or less.
Mastering Subtle Adjustments
Often, the difference between a good transition and a great one lies in the details. Don't just accept the default settings. Spend time tweaking the duration, direction, and any available parameters for the transition.
Sometimes, slightly softening the edge of a wipe or easing the speed of a dissolve makes it feel more integrated. Experimentation is key; what looks good on paper might feel different on screen, so always preview your changes thoroughly.
Frequently Asked Questions About Drone Transitions
How long should transitions be in drone footage?
Transition duration varies by style and intent. Subtle fades or dissolves might range from 0.5 to 2 seconds to blend scenes smoothly. Faster wipes or pushes can be as short as 0.25 to 0.5 seconds to maintain energy.
The key is that the duration should feel natural and serve the pacing of your video, not interrupt it.
Can I create my own custom transitions for drone footage?
Yes, many advanced video editing software packages allow you to create custom transitions. This often involves using motion graphics tools or combining multiple effects. However, for most users, the built-in library offers sufficient options for professional-looking results.
What's the difference between a wipe and a push transition?
A wipe transition involves a line or shape moving across the screen to reveal the next clip. A push transition is similar, but it looks like one clip is physically sliding the previous clip off the screen, creating a more dynamic and forceful reveal.
Are there specific transitions that look best with aerial footage?
Generally, smoother transitions like cross-dissolves, gentle fades, and subtle pushes work very well with aerial footage to maintain a cinematic feel. However, for more dynamic or action-oriented drone content, more energetic wipes or custom motion graphics can also be effective. The best choice depends on the specific mood and purpose of your footage.