How Do You Remove Flicker From Drone Footage?
So, you've captured some breathtaking aerial footage with your drone, only to find it's marred by that annoying, jarring flicker. It's like a visual hiccup that can completely derail an otherwise stunning shot. This common problem can make your carefully planned footage look amateurish and distract viewers.
Fortunately, understanding how do you remove flicker from drone footage involves a blend of smart shooting techniques and efficient post-production tools. Manufacturer specifications confirm that modern drones often have advanced camera systems, but achieving flicker-free results, especially under varying light conditions, still requires attention to detail. We'll break down the causes and the most effective solutions.
Image source: Wikimedia Commons / Joe Carr (CC BY-SA)
Quick Answer
Flicker in drone footage is typically removed by adjusting shutter speed to match light frequency and avoiding auto camera settings during shooting. In post-production, using dedicated deflicker plugins within video editing software analyzes and stabilizes frame brightness. For example, syncing shutter speed to 50Hz or 60Hz light frequencies is crucial.
Understanding Drone Footage Flicker
The first step to fixing any problem is understanding what's causing it. Drone footage flicker isn't usually a sign of a faulty camera; it's most often a consequence of how the camera interacts with its environment's light. This interaction is primarily dictated by two key settings: shutter speed and the frequency of the light source.
Why Your Drone Footage Might Be Flickering
Flicker in drone video manifests as rapid, noticeable variations in brightness or color across frames. This visual disruption typically occurs when the camera's shutter speed is not synchronized with the flicker rate of the ambient light source. This is especially common when filming under artificial lighting.
The Role of Shutter Speed and Light Frequency
Image source: Bing (Web (fair-use with source credit))
Light sources, particularly artificial ones like fluorescent bulbs or older LEDs, don't produce a constant stream of light. Instead, they flicker on and off very rapidly, at a frequency tied to the electrical current powering them. In North America, this frequency is typically 60 Hertz (Hz), meaning the light flickers 60 times per second.
In many other parts of the world, it's 50 Hz.
Your drone's camera captures video by taking a series of still images, or frames, very quickly. The shutter speed determines how long the camera's sensor is exposed to light for each of these frames. If the shutter speed is not aligned with the light's flicker frequency, you'll capture uneven amounts of light in consecutive frames.
For instance, if your shutter speed is set to 1/100th of a second, and you're under 60Hz lights, some frames might be captured when the light is at its brightest, while others are captured when it's dimmed or off. This inconsistency creates the visible flicker. Manufacturer specifications often detail shutter speed ranges, but manual control is key here.
Fixing Flicker: Prevention During the Shoot
The most effective way to eliminate flicker is to prevent it from happening in the first place. This requires a proactive approach during your drone flight and filming. By understanding the relationship between your camera's settings and the environment, you can capture clean footage from the outset.
Syncing Shutter Speed with Lights
To achieve flicker-free footage when shooting under artificial lights, it's essential to synchronize your drone camera's shutter speed with the frequency of the light source. This is a core principle outlined by broadcast standards for flicker reduction. For lights operating at 60 Hz, a shutter speed of 1/60th or 1/120th of a second is often ideal.
For 50 Hz lights, try 1/50th or 1/100th of a second.
- If filming under 60 Hz lights:
- Set your shutter speed to 1/60s (if possible with desired frame rate).
- Alternatively, use 1/120s, which also avoids capturing full flicker cycles.
- If filming under 50 Hz lights:
- Aim for a shutter speed of 1/50s.
- Or, use 1/100s as another safe option.
Many drone cameras require you to switch to a manual or professional shooting mode to access shutter speed adjustments. This level of control is critical for this specific type of correction.
Avoiding Auto-Settings for Consistency
Auto-exposure and auto-white balance settings on your drone's camera can be detrimental when trying to achieve flicker-free footage. While convenient for general shooting, these systems constantly adjust camera parameters in response to changing light. This means your camera might be trying to correct for minor light fluctuations or even the light's flicker itself, by subtly changing exposure or color temperature from frame to frame.
- Auto-Exposure: Can cause noticeable brightness shifts as the camera tries to maintain a consistent overall exposure.
- Auto-White Balance: May subtly alter the color cast of your footage, which can appear as a color flicker if the changes are rapid.
For consistent, flicker-free results, switch your camera to manual mode. This allows you to lock down settings like shutter speed, aperture (if adjustable), and white balance, ensuring a stable capture that isn't influenced by dynamic, automated adjustments.
Choosing the Right Lighting Conditions
While sync-based fixes are great for artificial lights, understanding natural light can also help prevent flicker-related issues. The sun, while seemingly constant, does change in intensity and angle throughout the day. Dramatic shifts in sunlight, like those occurring during sunrise or sunset, can cause luminance changes that might be perceived as flicker if your camera's auto-settings are trying to compensate too aggressively.
- Midday Sun: Generally provides the most consistent and even lighting, minimizing the risk of drastic changes that can challenge camera auto-settings.
- Cloud Cover: Diffused light from clouds can be very smooth, but sudden breaks in clouds can introduce rapid changes in brightness.
- Golden Hour: While visually appealing, the rapid changes in light intensity and color during sunrise and sunset can challenge auto-settings. If shooting during these times, manual control of your camera settings becomes even more important.
For the absolute smoothest footage, consider your flight path and timing to leverage the most stable natural light available.
Tackling Flicker in Post-Production
Sometimes, despite your best efforts, flicker can still creep into your drone footage. This is where post-production editing comes in to save the day. Fortunately, video editing software offers powerful tools specifically designed to address this issue, making previously unusable clips salvageable.
Leveraging Deflicker Plugins in Editing Software
Dedicated deflicker tools are the workhorses for correcting flicker after the fact. These specialized plugins are built into most professional video editing suites or can be added as third-party extensions. They operate by analyzing the brightness variations across frames in your video clip.
Based on this analysis, they intelligently adjust the brightness of individual frames to create a smooth, consistent output.
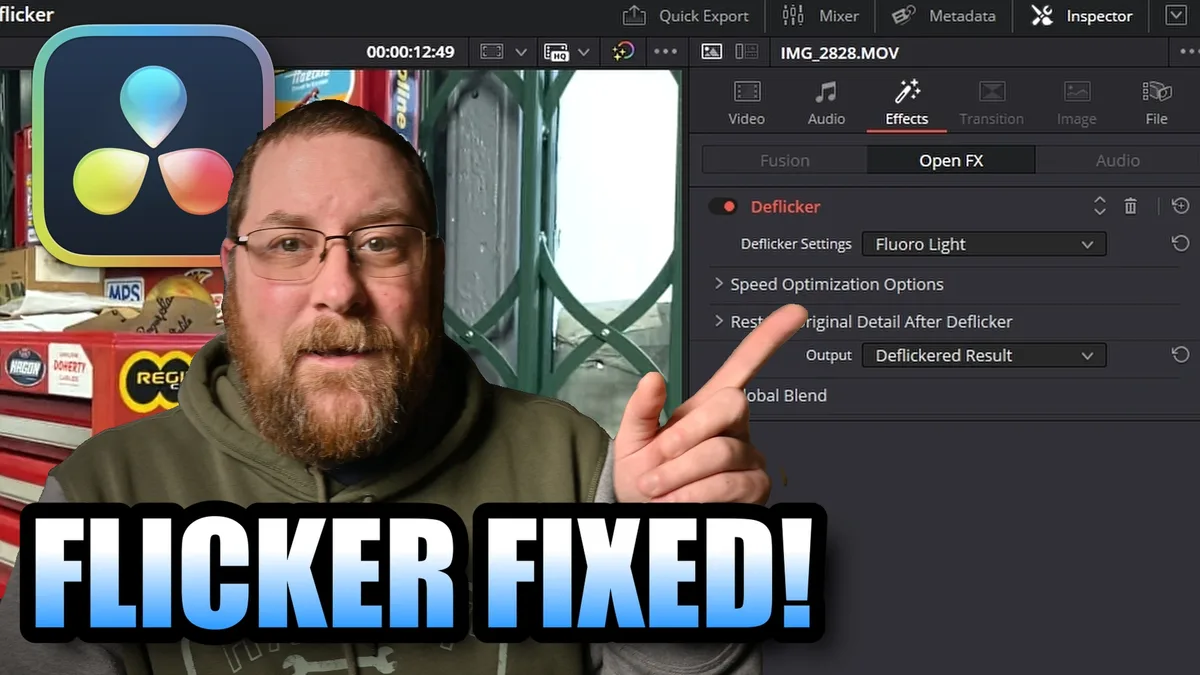
Image source: Bing (Web (fair-use with source credit))
The effectiveness of these plugins is remarkable, often capable of smoothing out rapid, erratic brightness changes that would be impossible to fix manually without immense effort. For instance, aggregate user reviews for these tools frequently report success in correcting flicker caused by fluorescent lighting or power fluctuations. As of 2026, the technology continues to advance, offering more sophisticated algorithms for natural-looking results.
Step-by-Step: Using a Deflicker Tool
Here’s a general workflow for using a deflicker plugin within most common video editing software, such as Adobe Premiere Pro, Final Cut Pro, or DaVinci Resolve.
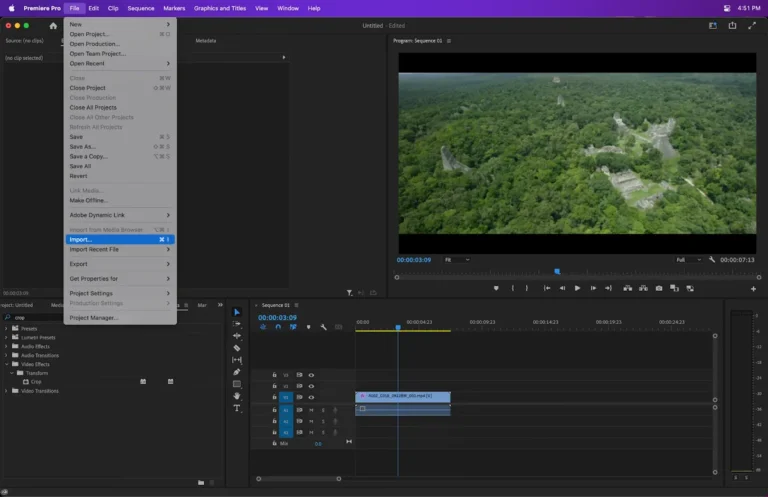
- Import Your Footage: Load your drone video clip into your editing timeline.
- Locate the Deflicker Effect: Find the "Deflicker" or "De-Flicker" effect in your software's effects panel. This might be under "Color Correction," "Utility," or a similar category.
- Apply to Your Clip: Drag and drop the deflicker effect directly onto the problematic video clip in your timeline.
- Adjust Sensitivity/Strength: The primary control you'll use is usually a "Sensitivity" or "Strength" slider. This dictates how aggressively the plugin analyzes and corrects brightness fluctuations.
- Start with a moderate setting.
- Gradually increase the value while previewing your footage. Watch for the flicker to diminish.
- Monitor for Artifacts: Be cautious not to over-apply the effect. Pushing the sensitivity too high can sometimes lead to unnatural "breathing" or a "milky" look in the footage, as the plugin might smooth out intentional lighting changes or introduce other visual anomalies.
- Fine-Tune Other Parameters (if available): Some advanced plugins offer additional controls, such as "Threshold," "Radius," or "Color Correction" options. Use these sparingly to refine the correction if needed.
- Render and Review: Once you're satisfied with the appearance, render out a section of the clip or the entire clip to see the final result. You may need to experiment to find the perfect balance between flicker removal and maintaining natural video quality.
Subtle Color Grading for Minor Adjustments
While dedicated deflicker plugins are the go-to for significant flicker issues, subtle color grading can sometimes help mask very minor, slow-moving brightness or color shifts. This isn't a solution for rapid, jarring flicker but can be useful for smoothing out gradual luminance changes that might otherwise be distracting. This technique involves making consistent, minor adjustments to your clip's overall exposure, contrast, or highlight levels.
- How it works: By making small, uniform changes, you can help blend slight variations in light that occur over longer periods within a shot.
- When to use it: Best applied when the "flicker" is more of a slow, almost imperceptible ebb and flow of light rather than a distinct on-off flashing.
- Limitations: This method won't fix rapid, high-frequency flicker. It's more about aesthetic smoothing than technical correction of rapid fluctuations. For true flicker, a deflicker plugin is required.
Common Flicker Issues and How to Solve Them
Different shooting environments and camera settings can lead to distinct types of flicker. Understanding these specific scenarios helps in applying the right solution.
Flicker from Artificial Lights (Indoor)
This is perhaps the most common type of flicker seen in drone footage. It arises when filming indoors under lights that emit light at a specific frequency, typically 50 Hz or 60 Hz, tied to the electrical grid. If the drone's camera shutter speed is not set to synchronize with this frequency, you'll capture alternating bright and dim frames.
- Cause: Mismatch between camera shutter speed and AC power frequency (50Hz or 60Hz).
- Solution:
- During Shooting: Switch to manual camera mode. Set shutter speed to match the light frequency (e.g., 1/50s or 1/100s for 50Hz; 1/60s or 1/120s for 60Hz).
- In Post-Production: Apply a deflicker plugin in your video editing software and adjust its sensitivity settings to smooth out the brightness variations.
Flicker from Natural Light Changes (Outdoor)
While natural light is generally more stable than artificial sources, rapid changes can still cause issues, particularly when auto-settings are in play. Sudden cloud cover passing over the sun, or even the sun itself momentarily peeking through leaves of a tree, can cause quick shifts in light intensity.
- Cause: Dynamic changes in sunlight, often exacerbated by camera auto-exposure or auto-white balance trying to adapt too quickly.
- Solution:
- During Shooting: Use manual camera settings for shutter speed, aperture, and white balance. Lock these down to prevent the camera from reacting to minor light fluctuations.
- In Post-Production: If the flicker is mild and slow, subtle color grading adjustments can sometimes smooth it out. For more pronounced issues, a deflicker plugin can still be effective, though it might require careful tuning.
Flicker from Camera Settings
Beyond shutter speed, other camera settings can indirectly contribute to perceived flicker. Aggressive automatic adjustments in exposure, gain, or even frame rate interpretation can lead to inconsistencies that manifest as flicker. Modern cameras often have advanced processing, but sometimes these automated processes introduce unwanted visual artifacts.
- Cause: Auto-exposure, auto-gain, or fluctuations in sensor readings.
- Solution:
- During Shooting: Always prioritize manual control over automatic settings. This includes exposure, white balance, and frame rate. Ensure your drone's firmware is up-to-date, as updates can sometimes address internal processing glitches.
- In Post-Production: If manual control wasn't possible, a deflicker plugin is your primary tool. Analyze which specific setting might be causing the issue (e.g., if brightness fluctuates, it's exposure; if color shifts, it's white balance) and use the deflicker tool to compensate.
Mistakes to Avoid When Removing Flicker
While fixing flicker is often straightforward, there are common pitfalls that can turn a simple correction into a bigger problem, or even ruin your footage. Being aware of these mistakes helps you use the available tools effectively and avoid unintended consequences.
Over-Applying Deflicker Effects
The most frequent error is using a deflicker plugin too aggressively. While the goal is to eliminate flicker, cranking up the sensitivity or strength settings too high can strip the natural dynamism from your footage. This results in an artificial, "plastic" look, sometimes described as the footage appearing to "breathe" unnaturally.
- What happens: The plugin smooths out all brightness variations, including subtle, intentional changes that contribute to a realistic look.
- How to avoid it: Always start with low sensitivity settings and gradually increase them while constantly reviewing the footage. Aim for just enough correction to remove the noticeable flicker, rather than trying to achieve absolute, uniform brightness that might look unrealistic. Check different parts of the clip to ensure the fix is consistent.
Ignoring the Root Cause of Flicker
It's easy to rely solely on post-production tools, but this often means missing an opportunity to capture better footage from the start. If your footage consistently suffers from flicker, especially during outdoor shoots, it’s a strong signal that your shooting technique needs adjustment. Relying solely on deflicker plugins can become a crutch.
- Why it's a problem: Ignoring the root cause means you're constantly fighting a battle you could win on location. It also means you might be applying a deflicker plugin to footage that was poorly captured and might not look optimal even after correction.
- The better approach: Before reaching for editing software, always consider if you can adjust your camera's shutter speed, exposure, or white balance settings on the drone itself to prevent flicker during recording. Manufacturer documentation often provides guidance on these settings for specific drone models.
Relying Solely on Post-Production Fixes
Even the best deflicker plugins have limitations. They are designed to correct specific types of flicker, primarily those related to light frequency or minor exposure fluctuations. If your footage has extreme, rapid color shifts, banding, or other complex visual artifacts, a deflicker plugin might not be able to fully correct it, or it might introduce new issues.
- When this fails: Extreme or complex flicker, such as that caused by aggressive auto-settings reacting wildly to changing conditions, can sometimes defy simple deflicker algorithms.
- What to do instead: If possible, re-shoot the footage with corrected camera settings. If re-shooting isn't an option, be prepared for the possibility that a perfect fix might not be achievable. Sometimes, accepting a minor amount of residual flicker or cropping the affected edges might be the best compromise.
FAQs About Drone Footage Flicker
### What's the most common cause of flicker in drone footage?
The most frequent cause is a mismatch between the drone camera's shutter speed and the frequency of artificial lighting, usually 50 Hz or 60 Hz. This leads to uneven light capture across frames.
### Can I fix flicker if I shot my footage with auto camera settings?
Yes, you can often fix flicker in post-production using deflicker plugins, even if you used auto settings. However, manual settings during shooting usually yield better results and less artifacting.
### How do I know if my drone camera's shutter speed is synced with the lights?
If you're shooting under artificial lights and see banding or brightness fluctuations that change with the light source, your shutter speed is likely out of sync. A common troubleshooting step is to manually set your shutter speed to a multiple of the light's frequency (e.g., 1/60s for 60Hz lights).
### Will a deflicker plugin make my footage look unnatural?
It can, if overused. Deflicker plugins work by stabilizing frame brightness. Applying them too aggressively can smooth out natural light variations, leading to a "breathing" effect or a loss of dynamic range.
Always use them judiciously, adjusting settings until the flicker is gone without introducing new visual problems.
### Is there a way to avoid flicker when flying outdoors?
Yes, by using manual camera settings. Lock your shutter speed, aperture, and white balance to prevent the camera from automatically adjusting to minor changes in sunlight or cloud cover, which can sometimes be mistaken for or cause flicker-like artifacts.
Your Guide to Flicker-Free Drone Shots
Achieving flicker-free drone footage is a combination of understanding the technical aspects of light and camera capture, and applying smart techniques both on location and in post-production. By prioritizing manual camera control during shoots, especially when dealing with artificial lighting, you can significantly reduce or eliminate flicker at its source. When prevention isn't fully possible, the advanced deflicker plugins available in modern video editing software offer powerful solutions.
Remember that over-reliance on post-production fixes can sometimes degrade footage quality. The best approach is always to capture the cleanest possible footage from the start by syncing shutter speed with light frequencies and avoiding unnecessary auto-settings. This proactive strategy ensures your aerial shots are smooth, professional, and ready for any project without the distraction of unwanted visual artifacts.
FAQs About Drone Footage Flicker
### What's the most common cause of flicker in drone footage?
The most frequent cause is a mismatch between the drone camera's shutter speed and the frequency of artificial lighting, usually 50 Hz or 60 Hz. This leads to uneven light capture across frames.
### Can I fix flicker if I shot my footage with auto camera settings?
Yes, you can often fix flicker in post-production using deflicker plugins, even if you used auto settings. However, manual settings during shooting usually yield better results and less artifacting.
### How do I know if my drone camera's shutter speed is synced with the lights?
If you're shooting under artificial lights and see banding or brightness fluctuations that change with the light source, your shutter speed is likely out of sync. A common troubleshooting step is to manually set your shutter speed to a multiple of the light's frequency (e.g., 1/60s for 60Hz lights).
### Will a deflicker plugin make my footage look unnatural?
It can, if overused. Deflicker plugins work by stabilizing frame brightness. Applying them too aggressively can smooth out natural light variations, leading to a "breathing" effect or a loss of dynamic range.
Always use them judiciously, adjusting settings until the flicker is gone without introducing new visual problems.
### Is there a way to avoid flicker when flying outdoors?
Yes, by using manual camera settings. Lock your shutter speed, aperture, and white balance to prevent the camera from automatically adjusting to minor changes in sunlight or cloud cover, which can sometimes be mistaken for or cause flicker-like artifacts.
Your Guide to Flicker-Free Drone Shots
Achieving flicker-free drone footage is a combination of understanding the technical aspects of light and camera capture, and applying smart techniques both on location and in post-production. By prioritizing manual camera control during shoots, especially when dealing with artificial lighting, you can significantly reduce or eliminate flicker at its source. When prevention isn't fully possible, the advanced deflicker plugins available in modern video editing software offer powerful solutions.
Remember that over-reliance on post-production fixes can sometimes degrade footage quality. The best approach is always to capture the cleanest possible footage from the start by syncing shutter speed with light frequencies and avoiding unnecessary auto-settings. This proactive strategy ensures your aerial shots are smooth, professional, and ready for any project without the distraction of unwanted visual artifacts.