What Shutter Speed Should I Use for Drone Video?
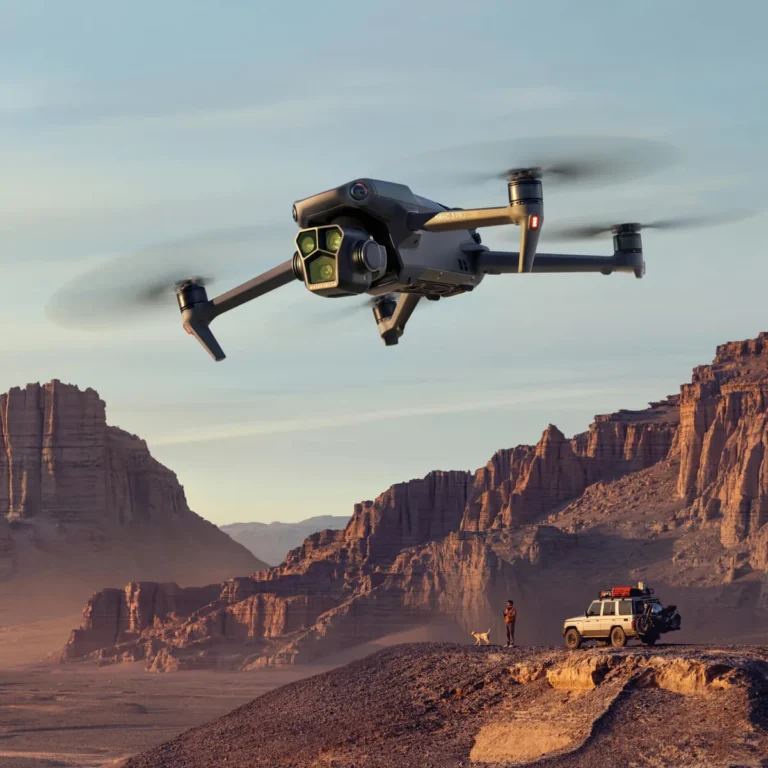
Image source: Bing (Web (fair-use with source credit))
What shutter speed should I use for drone video? Getting this right makes your footage look smooth and cinematic, instead of choppy and jarring. The key is understanding how shutter speed affects motion blur, which is crucial for capturing movement naturally on camera.
If you've ever wondered why some drone shots feel "right" while others look off, shutter speed is often the culprit. The generally accepted guideline for most cinematic video, often called the 180-degree rule, suggests setting your shutter speed to double your frame rate. For instance, shooting at 30 frames per second (fps) typically means a shutter speed of 1/60th of a second.
Quick Answer
For smooth drone video, aim for a shutter speed double your frame rate. Use 1/50s for 24fps, 1/60s for 30fps, and 1/120s for 60fps. This creates natural motion blur.
Adjustments are needed for bright light or specific creative effects.
Understanding Drone Video Shutter Speed
Shutter speed is one of the three core pillars of exposure in photography and videography, alongside aperture and ISO. In simple terms, it's the duration that your drone's camera sensor is exposed to light. Think of it like blinking your eyes: a quick blink lets in less light and freezes motion, while a longer blink lets in more light and blurs movement.
In video, this motion blur is what gives footage its sense of fluidity. Too little blur (a very fast shutter speed) makes movement look jerky, almost like a stop-motion animation. Too much blur (a very slow shutter speed) can make fast action indistinguishable and appear overly washed out, even if the overall exposure is correct.
Manufacturer specifications for modern drones often provide manual control over this setting, allowing for precise adjustments.
The 180-Degree Rule: Your Starting Point for Smooth Motion
The 180-degree rule is the cornerstone for achieving natural-looking motion in video, and it's especially vital for drone videography where movement is inherent. This rule isn't about actual degrees but a ratio: your shutter speed should be approximately double your frame rate. This ratio ensures that the motion captured on screen mimics how our eyes naturally perceive movement.
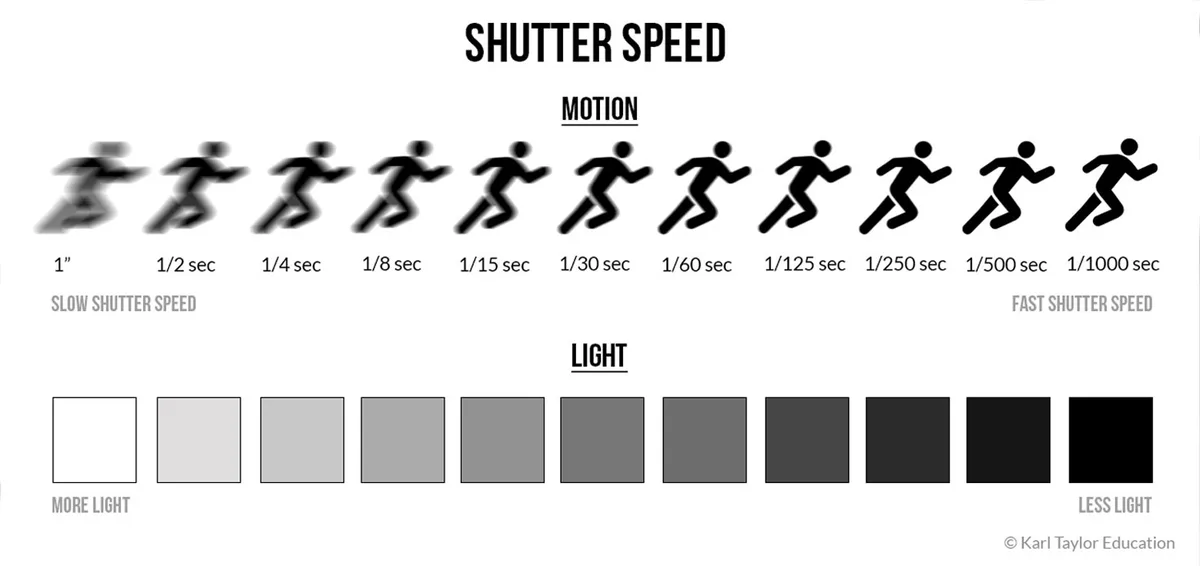
Image source: Bing (Web (fair-use with source credit))
It’s a principle born from the early days of film, where each frame was exposed for roughly half of the time available in a full rotation of a camera's shutter mechanism. This established a standard for how motion should be rendered to feel realistic. Adhering to this rule prevents the "stutter" effect that occurs when motion is too sharp, making your aerial shots feel more polished and professional.
Why Double Your Frame Rate?
The reason behind doubling your frame rate is to create a specific amount of motion blur. When you film at 30 frames per second (fps), your camera captures 30 distinct still images every second. If you set your shutter speed to something very fast, like 1/1000th of a second, each frame captures a frozen moment.
When these frames are played back, the lack of blur between them makes fast movements appear choppy.
By setting your shutter speed to roughly half the inverse of your frame rate, you introduce a controlled amount of blur. For example, at 30fps, a shutter speed of 1/60th of a second means each frame is exposed for approximately 1/60th of a second. This duration allows for just enough blur to simulate natural vision, making the playback of motion feel smooth and continuous.
It’s the standard for a reason; it just looks right to our eyes.
What Shutter Speed for 24fps?
If you're aiming for that classic, cinematic look often seen in movies and high-end productions, shooting at 24 frames per second (fps) is a common choice. To achieve the associated motion blur with the 180-degree rule, your shutter speed should be set to 1/50th of a second. Some drone cameras might only offer 1/48th of a second as an option, which is perfectly acceptable and effectively the same for practical purposes.
This setting provides a familiar visual cadence for motion. It’s what most viewers subconsciously expect when watching narrative content. Whether you're capturing sweeping landscapes or tracking a subject, 24fps with a 1/50s or 1/48s shutter speed will give your footage that desired filmic quality.
It’s the go-to for a reason.
What Shutter Speed for 30fps?
Many drones default to or offer 30 frames per second (fps) as a standard recording option, especially for footage intended for web use or broadcast television. Following the 180-degree rule, the corresponding shutter speed to aim for is 1/60th of a second. This setting is incredibly versatile and strikes a great balance between smooth motion and sufficient detail.
This combination is often used for general-purpose videography because it looks natural on most screens and is widely compatible. It offers a slightly crisper feel than 24fps while still retaining enough motion blur to avoid that overly sharp, digital look that can sometimes detract from the viewing experience. It’s a reliable choice for a wide array of drone shots.
What Shutter Speed for 60fps?
Shooting at higher frame rates like 60 frames per second (fps) opens up possibilities for smooth slow-motion playback in post-production. If you plan to slow your footage down by 50% (e.g., playing 60fps back at 30fps), the 180-degree rule suggests setting your shutter speed to 1/120th of a second. This maintains the correct motion blur for the recorded frame rate, so when you slow it down, the motion still looks natural.
When you then play this 60fps footage back at 30fps, the slower playback speed will naturally stretch out the existing motion blur, creating that desirable smooth slow-motion effect. If you were to shoot at 60fps with a very fast shutter speed (like 1/500s), your slow-motion footage would appear unnaturally sharp and jerky, defeating the purpose of slowing it down for fluidity. The goal is to capture motion with the correct blur at the frame rate you record.
Adjusting for Light: Beyond the 180-Degree Rule
While the 180-degree rule is your best friend for smooth motion, it's not the only factor to consider. Light is a huge variable, and you'll often need to adjust your shutter speed, or other settings, to get a well-exposed image. If you stick rigidly to the 180-degree rule in very bright sunlight, your footage might end up overexposed, just too bright to be usable.
Conversely, in dimmer conditions, you might find your footage too dark.
Image source: Bing (Web (fair-use with source credit))
This is where understanding your drone’s camera controls becomes essential. Beyond shutter speed, aperture (if your drone has adjustable aperture) and ISO play key roles in exposure. However, manipulating shutter speed is often the first step, but it must be done thoughtfully to preserve that desirable motion blur.
As of 2026, most advanced drones offer comprehensive manual control over these settings.
Too Bright? Dealing with Overexposure
If you're flying under bright, midday sun and find your footage is washing out (overexposed), even when following the 180-degree rule, you've got a problem. Your shutter speed is likely too slow for the available light. The simplest and most effective solution is to use a Neutral Density (ND) filter.
These filters work like sunglasses for your drone’s camera, reducing the amount of light entering the lens without altering colors.
If you don't have an ND filter handy, your only option is to increase your shutter speed. For example, if you're shooting at 30fps (ideally 1/60s) and it's too bright, you might have to increase your shutter speed to 1/120s or even 1/240s. However, this comes at a cost: you'll lose some of that natural motion blur, potentially making motion look sharper and slightly more artificial.
Always try an ND filter first if possible.
Too Dark? Fighting Underexposure
On the flip side, when you're shooting in low-light conditions like dawn, dusk, or overcast days, you might find your footage is too dark (underexposed). The 180-degree rule might already be pushing your shutter speed as slow as it can comfortably go without introducing too much blur. In this scenario, you have a few primary tools to bring more light into your sensor.
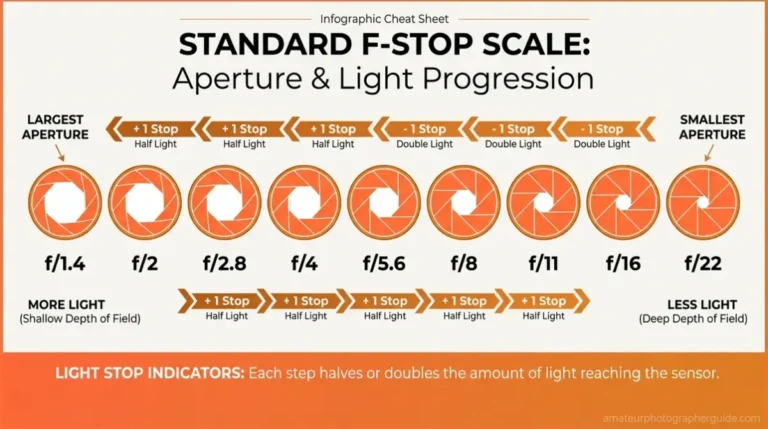
First, consider your aperture. If your drone camera has an adjustable aperture (often represented by an f-number like f/2.8 or f/4), opening it wider lets in more light. For example, changing from f/4 to f/2.8 doubles the amount of light hitting the sensor.
If aperture adjustment isn't an option or isn't enough, your next step is to increase your ISO. ISO controls the sensor's sensitivity to light. However, increasing ISO too much can introduce digital noise, that grainy appearance, which degrades image quality.
It's a trade-off between a dark image and a noisy image, so find the balance that works best for your footage.
When to Break the Rules: Creative Shutter Speed Choices
While the 180-degree rule is your standard for natural-looking motion, there are times when intentionally deviating from it can yield compelling creative results. Understanding why you'd break the rule is key to using it effectively without making your footage look unintentional. These are not mistakes, but deliberate artistic choices.
These deviations often come down to creating a specific visual feel. It’s about sacrificing some naturalism for a particular aesthetic. Think of it as using a different brush stroke to achieve a unique look in a painting.
For a Stuttery, Hyper-Real Look
If you want your video to have a sharper, more immediate, almost hyper-real quality, you can deliberately increase your shutter speed beyond the 180-degree rule. This means setting your shutter speed to a value much faster than double your frame rate. For instance, shooting at 30fps and setting your shutter speed to 1/250s or even 1/500s will drastically reduce motion blur.
The effect is that movement appears more staccato, with less blur between frames. This can emphasize the individual frames, giving the footage a slightly choppy or "digital" feel. It’s a style that can work well for fast-paced action, certain types of music videos, or when you want to highlight sharp details in fast-moving objects.
However, it’s a look that needs to be applied intentionally, as it can quickly make footage appear unnatural if overused or used incorrectly.
For Slow-Motion Footage
When you plan to slow down your footage in editing, the 180-degree rule still applies, but you apply it to your shooting frame rate. For example, if you want to achieve smooth 50% slow-motion, you'd typically shoot at 60fps. To maintain natural motion blur at 60fps, you should set your shutter speed to 1/120th of a second.
This ensures that the recorded motion has the correct amount of blur.
When you then play this 60fps footage back at 30fps, the slower playback speed will naturally stretch out the existing motion blur, creating that desirable smooth slow-motion effect. If you were to shoot at 60fps with a very fast shutter speed (like 1/500s), your slow-motion footage would appear unnaturally sharp and jerky, defeating the purpose of slowing it down for fluidity. The goal is to capture motion with the correct blur at the frame rate you record.
Common Mistakes and How to Avoid Them
When you're starting out with drone videography, it's easy to make a few common mistakes with shutter speed that can impact your final footage. The most frequent one is not following the 180-degree rule at all, leading to motion that looks either too choppy or too blurry. Another pitfall is neglecting to adjust for changing light conditions, which results in over- or underexposed shots, even if the motion blur is technically correct.
A related error is using a very fast shutter speed in low light. While you might be trying to get a usable exposure, this dramatically reduces motion blur, making everything look stiff. Conversely, always keeping the shutter speed as slow as possible to maximize light can lead to excessive motion blur, making fast action unwatchable.
It's about finding that sweet spot that balances exposure with natural-looking motion. Finally, forgetting to check your settings after changing lighting conditions or drone flight patterns can lead to unexpected visual artifacts.
Expert Tips for Perfect Drone Video Shutter Speed
To consistently nail your drone video shutter speed settings, a few pro techniques can make a big difference. First, always set your frame rate first, then adjust your shutter speed to double that rate. This establishes your baseline for natural motion.
If you can't get the right exposure with that setting, reach for an ND filter before you speed up your shutter. Manufacturer documentation for DJI drones, for example, often highlights the importance of ND filters for maintaining creative control in bright conditions.
Invest in a good set of ND filters (like ND8, ND16, ND32) for your drone. They are essential tools for maintaining the 180-degree rule in varying light. Also, get familiar with your drone's exposure tools, like histograms, which provide a visual representation of your exposure levels.
They can help you quickly identify over- or underexposed areas. Finally, practice shooting in different lighting scenarios and review your footage to understand how shutter speed changes affect the look of motion. This hands-on experience is invaluable.
Use Cases: Who Needs to Think About Shutter Speed?
Anyone shooting video with a drone can benefit from understanding shutter speed, but it's particularly critical for specific types of content creators. If you're aiming for a professional, polished look, mastering this setting is non-negotiable. This includes filmmakers, documentary makers, and even serious hobbyists who want their aerial footage to stand out.
It's also vital for businesses using drone video for marketing or real estate. Smooth, cinematic shots convey professionalism and attention to detail, which can positively impact how clients perceive your services. For travel vloggers and adventure documentarians, consistent and natural-looking motion makes the viewer feel more immersed in the experience, enhancing storytelling.
Comparisons: What Other Settings Can Affect Motion?
While shutter speed is your primary tool for controlling motion blur, other camera settings can indirectly influence or compensate for its effects. Aperture, for instance, controls the amount of light entering the lens and the depth of field. In bright conditions, if you're forced to speed up your shutter beyond the 180-degree ideal to manage exposure, having an adjustable aperture (like f/2.8 on some advanced drones) allows you to compensate by opening it up, letting in more light and potentially allowing a slightly slower shutter speed.
ISO sensitivity is another factor. In low light, if you can't achieve proper exposure by opening the aperture or slowing the shutter speed (without breaking the 180-degree rule too much), you might increase the ISO. However, this introduces digital noise.
Too much noise can make footage look grainy and less pleasant, which isn't directly related to motion blur but affects overall image quality. Therefore, while shutter speed dictates motion blur, aperture and ISO are your allies in achieving correct exposure while trying to maintain that ideal shutter speed setting.
Frequently Asked Questions About Drone Shutter Speed
How do I change the shutter speed on my drone?
Most modern drones allow you to change shutter speed through the camera settings menu in the accompanying mobile app. You'll typically find it under manual or pro video mode settings, often alongside options for ISO and aperture.
Should I use auto or manual shutter speed for drone video?
For professional-looking drone video, manual control is highly recommended. Auto settings can be unpredictable, especially with changing light, and may not adhere to the 180-degree rule. Manual settings give you consistent creative control over motion blur.
What happens if my shutter speed is too slow?
If your shutter speed is too slow for the amount of light, your footage will be overexposed (too bright). In very dark conditions, a slow shutter speed can also lead to excessive motion blur, making fast movements appear smeared and indistinct.
Can I use a shutter speed faster than 1/120s for 60fps?
Yes, you can, but it will reduce motion blur. If you shoot at 60fps with a shutter speed of 1/250s, your slow-motion playback will appear much sharper and more "digital" or "stuttery" because there's less natural blur between frames. Sticking close to 1/120s for 60fps is best for smooth slow-motion.