How Do You Stabilize Drone Footage?
So, you've been out flying your drone, getting some awesome aerial shots, but when you watch them back, they're a bit… wobbly. Totally happens! It's like trying to hold a camera steady while riding a roller coaster sometimes.
But don't sweat it, we can definitely get that footage looking smoother and way more professional.
Think of it like this: your drone is doing its best, but the wind, the controls, or even the vibrations from the motors can all add a little shake to your video. The good news is, there are a few ways to tackle this, both while you're flying and after you've landed. For instance, a well-calibrated gimbal, as recommended by DJI, can significantly reduce micro-vibrations during flight.
We'll walk through it step-by-step, just like figuring out the best way to get that perfect shot.
Quick Answer
You stabilize drone footage by combining smooth flying techniques with post-production video editing software. Prioritize gentle control inputs and understanding wind conditions during flight. Then, use stabilization effects in software like Adobe Premiere Pro to smooth out remaining jitters.
Adjust settings like "smoothness" and "cropping" to achieve a natural look.
Why Is My Drone Footage So Shaky?
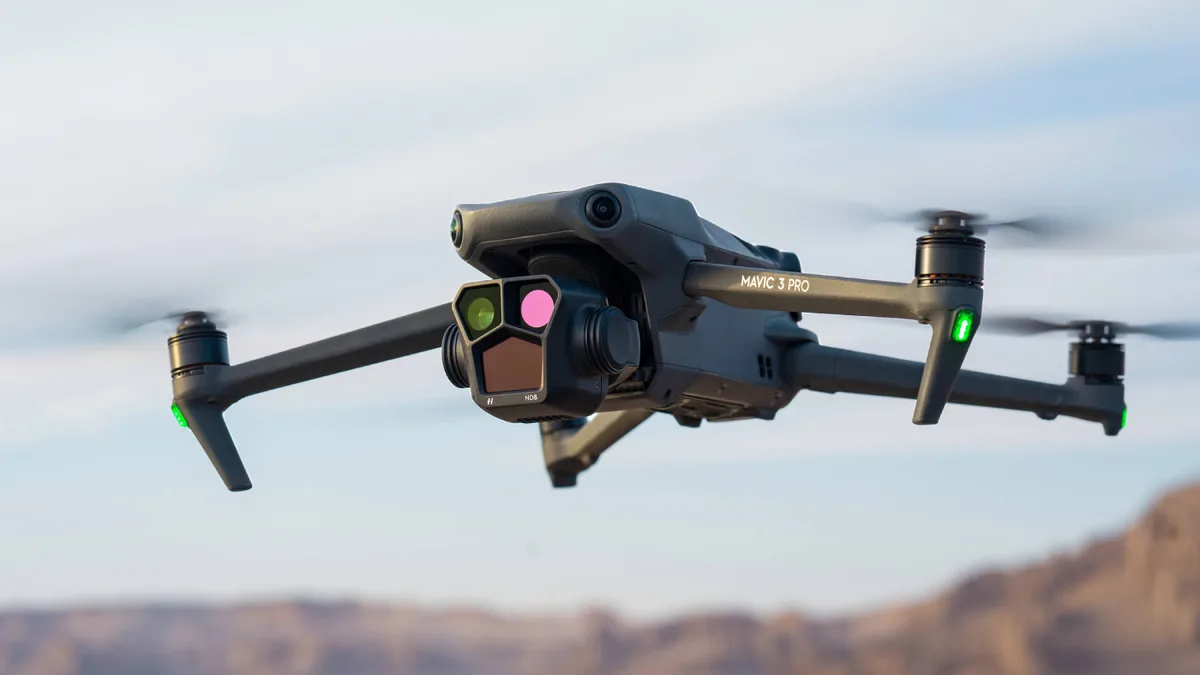
It's a common frustration: you’ve captured some breathtaking aerial views, only to find the playback is jarring and hard to watch. This shakiness comes from a few places. Your drone isn't a perfectly still object; it's constantly reacting to air currents, motor vibrations, and the subtle movements you make with the controller.
Even a slight gust of wind can nudge the drone, and if your camera isn't perfectly stabilized, that movement translates directly to your video.
Gentle Controls, Big Difference
The number one reason for shaky footage is how you fly the drone. Think of flying like a dance. If you're jerky and sudden with your movements, the drone wobbles.
If you’re smooth and deliberate, the drone glides. Every time you push the joystick, the drone’s motors work to respond, and this adjustment can cause a tiny jolt. For example, aggressive yaw (turning) or tilt movements are often the culprits behind noticeable camera shake in the final video.
Understanding Wind and Your Drone
Wind is a drone pilot's best friend and worst enemy. While it can add a sense of motion, strong or gusty winds will absolutely shake your drone. Your drone's built-in gimbal is designed to counteract this, but it has limits.
Manufacturer specifications often detail maximum wind speeds a drone can handle while maintaining stable flight, with some consumer models rated for winds up to 20-25 mph (32-40 km/h) before stabilization becomes challenging. If you're flying in conditions that push these limits, expect some shakiness.
Smooth Flying: Preventing Shake While You're In The Air
The most effective way to get stable drone footage is to minimize shakiness while you're actually flying. It sounds obvious, but mastering this skill makes a huge difference and often reduces the amount of work you’ll need to do later. Think of it as setting yourself up for success before you even hit record.
Gentle Controls, Big Difference
This is probably the most critical tip. When you're flying, aim for slow, deliberate movements. Instead of jamming the joystick, apply gentle pressure.
This allows the drone's motors and flight controller to make smooth adjustments rather than sudden, jerky ones. For instance, when panning (turning the drone left or right to follow a subject), use the least amount of stick input necessary to achieve the desired speed. This prevents the drone from overcorrecting and causing wobble.
Understanding Wind and Your Drone
Wind is a drone pilot's best friend and worst enemy. While it can add a sense of motion, strong or gusty winds will absolutely shake your drone. Your drone's built-in gimbal is designed to counteract this, but it has limits.
Manufacturer specifications often detail maximum wind speeds a drone can handle while maintaining stable flight, with some consumer models rated for winds up to 20-25 mph (32-40 km/h) before stabilization becomes challenging. If you're flying in conditions that push these limits, expect some shakiness.
Fixing Your Footage: Stabilization in Video Editing
Even with the smoothest flying, some subtle shakes might still sneak into your footage. That's where video editing software comes in. Modern editing programs have powerful tools designed specifically to smooth out these jitters, making your video look polished and professional.
How Video Stabilization Works
At its core, video stabilization software analyzes the movement within your footage. It tracks how the image shifts frame by frame and then digitally counteracts that movement. Imagine it like digitally moving the camera in the opposite direction of the shake.
To do this effectively, the software often needs to "zoom in" slightly on your footage and crop the edges. This cropping is necessary because as it repositions the image to counteract shake, parts of the original frame would otherwise go off-screen. This process helps maintain a stable viewpoint for the viewer.
Applying the Stabilization Effect: A Step-by-Step Guide
Most video editing software makes this process fairly straightforward. Here’s a general workflow:
- Import Your Clip: Load the shaky drone video file into your editing project.
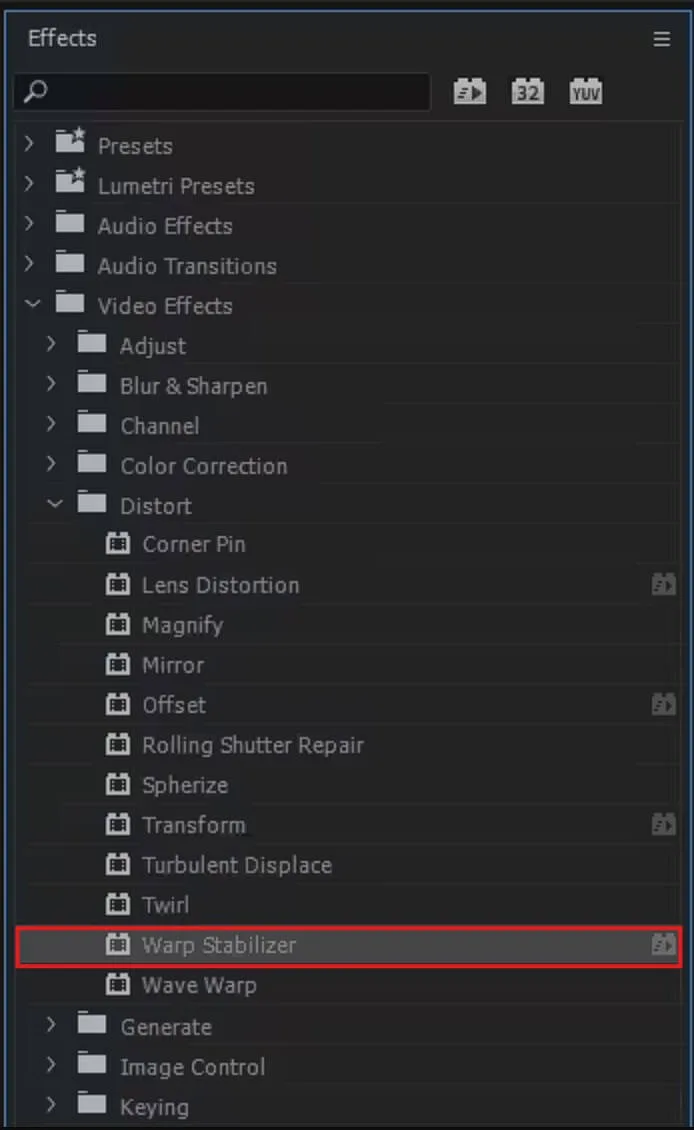
- Find the Stabilization Effect: In Adobe Premiere Pro, this is often called "Warp Stabilizer." In Final Cut Pro, it's "Stabilization." DaVinci Resolve has a similar feature under its "Color" page.
- Apply the Effect: Drag and drop the stabilization effect onto your video clip.
- Analyze: The software will then analyze your clip to detect motion. This can take a few moments, depending on the length and resolution of your footage.
- Adjust Settings: Once analyzed, you'll see options to fine-tune the stabilization. This is where you’ll spend most of your time.
Key Stabilization Settings to Tweak
When you apply a stabilization effect, you'll usually find a few crucial settings to adjust. These allow you to control how much stabilization is applied and how it affects your footage:
- Smoothness: This is your primary control. A higher smoothness value means the software will try harder to eliminate all perceived motion, leading to a very stable, almost still-camera look. However, setting this too high can make your footage look unnatural or introduce that "wobbly" or "Jello effect" where the entire image seems to undulate. A good starting point is often around 10-20%, gradually increasing as needed.
- Method/Mode: Some software lets you choose between different stabilization methods, such as "Position," "Scale," "Rotation," or "All." "Position" only adjusts the X and Y coordinates. "Scale" also allows for slight zooming, while "Rotation" accounts for the camera turning. "All" is the most comprehensive, correcting for all these types of motion. For drone footage, "All" is often the best choice, but it may crop your image more significantly.
- Crop/Unfold: Because stabilization requires repositioning the image, it inherently crops your video. You can usually adjust how much it crops. "Unfold" or similar features attempt to intelligently fill the cropped areas, sometimes by stretching the remaining image or using intelligent content-aware filling, but this can lead to visual artifacts.
- Rolling Shutter Compensation: Many drone cameras use a CMOS sensor that can lead to a "rolling shutter" effect, making fast-moving objects or rapid movements appear distorted or wobbly. If you notice this specific kind of distortion, enabling rolling shutter compensation in your stabilization settings can help correct it.
When to Use Software Stabilization: Pros and Cons
Using stabilization tools within your video editing software is incredibly powerful, but it’s not always a magic bullet. Understanding its strengths and weaknesses will help you decide when and how to use it.
Benefits and Drawbacks
| Pros | Cons |
|---|---|
| Saves Footage: Can make otherwise unusable shaky footage watchable. | Image Cropping: Always results in some loss of the original frame. |
| Increased Professionalism: Delivers smoother, more cinematic results. | Potential for Artifacts: Over-stabilization can create unnatural warping or "Jello effect." |
| Accessibility: Widely available in most modern video editing programs. | Processing Time: Requires rendering, which can be time-consuming for long clips. |
| Fine-Tuned Control: Allows precise adjustments to achieve desired stability. | Not a Replacement for Good Flying: Can't fully fix extremely erratic movement. |
When to Rely on It
You’ll want to lean heavily on software stabilization when:
- You experienced unexpected wind gusts during your flight.
- You were practicing advanced maneuvers and had some minor wobbles.
- Your drone's built-in gimbal calibration wasn't perfect.
- You need to quickly improve a batch of clips without re-flying.
Common Mistakes When Stabilizing Drone Footage
While stabilization tools are great, it's easy to overdo it or misuse them, leading to footage that looks worse than the original. Avoiding these common pitfalls will help you achieve that smooth, natural look you're after.
Over-Stabilizing the Footage
The most frequent mistake is setting the "smoothness" or stabilization intensity too high. While it seems counterintuitive, making footage perfectly still can look unnatural, robotic, or even sickening to watch. Human eyes are used to seeing some subtle motion, even in highly stable shots.
If your footage starts to look like it's floating or has a strange undulating quality, you've likely applied too much stabilization. Aim for stability that enhances the viewing experience, not one that makes it look artificial.
Ignoring the Crop Factor
As mentioned, stabilization works by repositioning frames, which necessitates cropping. If you’re not mindful of how much the image is being cropped, you might lose important elements at the edges of your frame, like the horizon, your subject, or important details. Always check the cropped edges of your stabilized footage to ensure you haven't unintentionally cut anything vital out.
Some software offers an "Unfold" or "Fill Edges" option, but use this cautiously, as it can introduce distortions.
Not Understanding the Source of Shake
Trying to fix footage without understanding why it's shaky can lead to frustration. If the primary issue is severe wind buffeting, software stabilization might struggle to compensate adequately without significant cropping or introducing artifacts. In such cases, it’s often better to accept a degree of natural movement or try to fly more conservatively in windy conditions.
If the shake is due to motor vibration, ensuring your drone is properly maintained is the first step before relying solely on post-production fixes.
Expert Tips for Ultra-Smooth Drone Video
Beyond the basic settings, a few pro techniques can significantly elevate your drone footage's smoothness. Think of these as the finishing touches that make your video pop. One often-overlooked tip is to ensure your drone's firmware is up-to-date.
Manufacturers like Autel Robotics periodically release updates that can improve gimbal performance and flight stability, as confirmed by their official support bulletins.
Another key is to pre-plan your shots. If you know you'll be doing a complex move, practice it at a safe altitude first. This allows you to get a feel for the drone's responsiveness in that specific scenario, reducing the likelihood of abrupt movements during recording.
When reviewing your footage, also consider if stabilization is truly necessary for every shot. Some dynamic, slightly shaky shots can actually add a sense of realism and energy, especially during action sequences. It’s about balance, not always absolute stillness.
Get the Right Angle
Sometimes, the angle of your shot can exacerbate shakiness. For instance, a wide-angle shot might make slight movements appear more dramatic than a telephoto shot. Experimenting with different focal lengths or camera angles in your editing software can sometimes help mask minor imperfections.
Even a slight tilt up or down might hide residual jitter better than a perfectly level horizon.
Gradual Adjustments
When applying stabilization in your editing software, make changes incrementally. Instead of jumping straight to a high smoothness setting, start low and gradually increase it. This helps you stay within the "sweet spot" where the footage is stable but still looks natural.
Pay attention to the preview window. If the stabilization introduces new, jarring movements or causes the edges of the frame to warp excessively, dial it back.
Understand Your Drone's Capabilities
Different drones have different gimbal systems and flight controllers. A high-end professional drone might have a gimbal that can compensate for much more movement than a basic consumer model. Familiarize yourself with your specific drone's limitations and capabilities.
Knowing this will help you set realistic expectations for both flight and post-production stabilization.
Frequently Asked Questions About Drone Stabilization
How long does it take to stabilize drone footage?
The time it takes to stabilize drone footage varies greatly. In video editing software, the analysis phase for a few minutes of footage might take anywhere from 30 seconds to several minutes. Rendering the final stabilized video can take longer, from a few minutes to over an hour, depending on the video's length, resolution, and your computer's processing power.
Can I stabilize footage directly on the drone?
Most drones do not offer in-flight video stabilization beyond what the physical gimbal provides. Some newer models might have limited electronic image stabilization (EIS) that works in conjunction with the gimbal, but the most significant stabilization is typically done in post-production using video editing software. This allows for more control and better results.
Does stabilization crop my video?
Yes, almost all software-based video stabilization methods will crop your video. The software needs to digitally move the image around to counteract shakiness, and this repositioning causes the edges of the original frame to be cut off. The amount of cropping depends on the intensity of the stabilization applied and the specific settings used.
Is it better to stabilize in-flight or in post-production?
It's almost always better to use both. A well-functioning gimbal and smooth flying during capture provide the best foundation. Post-production stabilization can then refine any remaining minor jitters.
Relying solely on post-production can lead to significant cropping and potential visual artifacts, whereas neglecting flight stability means even the best software will struggle to produce a natural look.
What's the difference between gimbal stabilization and software stabilization?
Gimbal stabilization is a physical process where a motorized three-axis gimbal on the drone actively counteracts movement to keep the camera level and steady. Software stabilization is a digital process within video editing software that analyzes recorded footage and digitally manipulates the image to smooth out perceived shakes and jitters. They work together for the best results.