How Do You Do a Drone Flyover Shot?
Getting that sweeping, cinematic view with your drone can transform your footage from ordinary to extraordinary. If you've ever wondered how to achieve that smooth, gliding motion over landscapes or structures, you're in the right place. It's less about magic and more about preparation, understanding your drone's capabilities, and a bit of careful execution.
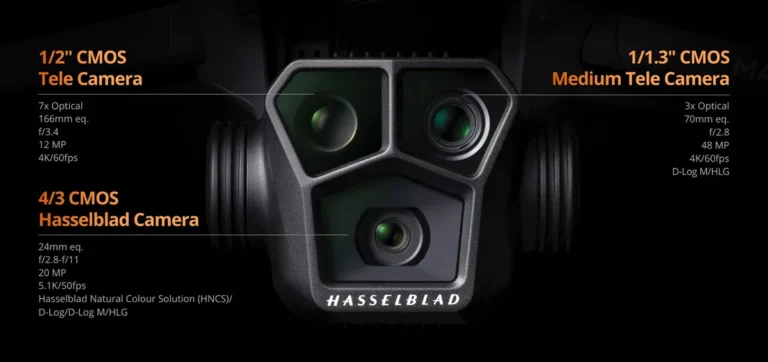
Our research indicates that achieving a professional-looking drone flyover shot involves a combination of meticulous planning and precise control. For instance, manufacturer specifications often highlight the importance of camera stabilization systems, with many drones today featuring 3-axis gimbals capable of smoothing out minor vibrations. This technical capability, combined with thoughtful flight path design, is crucial for the desired outcome.
Quick Answer
To do a drone flyover shot, plan your path carefully, ensuring clear airspace. Use smooth, consistent controller inputs for horizontal movement. Leverage intelligent flight modes like Waypoint Navigation for automated precision.
Always maintain visual line of sight. Keep camera gimbal adjustments subtle.
Understanding the Drone Flyover Shot
A drone flyover shot is fundamentally about movement and perspective. It’s defined by the drone traveling horizontally over a scene or subject, providing a dynamic viewpoint that a stationary shot simply can't. Think of it as the drone smoothly gliding forward, often revealing more of the environment as it moves.
This type of shot is incredibly versatile, adding a professional polish to everything from real estate videos to travel documentaries.
The core of this shot lies in the drone’s ability to maintain a consistent altitude and speed while its camera captures the unfolding scenery. This requires precise control over the drone’s pitch (forward/backward movement) and often subtle adjustments to yaw (rotation) to keep the subject framed. It's the visual storytelling aspect, guiding the viewer's eye through a space, that makes flyovers so impactful.
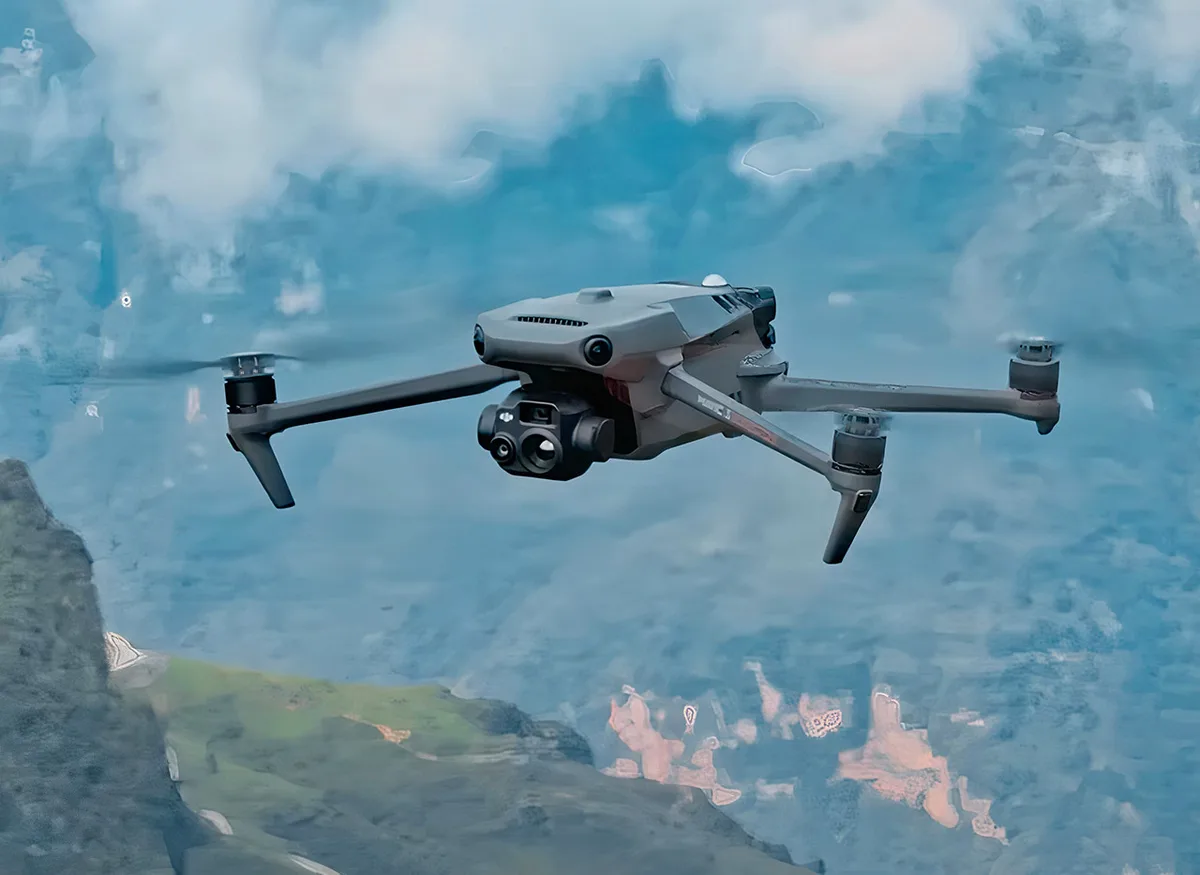
Image source: Bing (Web (fair-use with source credit))
Why Visuals Are Key for Drone Flyovers
When we talk about drone flyover shots, visuals aren't just helpful; they're the entire point. You can describe a smooth glide, but seeing it demonstrates what "smooth" actually looks like. Visuals help you understand the spatial relationships involved, how far the drone needs to be from an obstacle, the best angle to capture light, and the overall composition.
Consider a hypothetical scenario: you read instructions on how to pan a camera, but watching a video of someone making those subtle wrist movements provides an immediate understanding that words alone struggle to convey. For drone flyovers, this means understanding how a drone’s camera tilt, pan, and the drone’s own forward motion work together. Visual references show how slight camera adjustments can keep a building perfectly centered as the drone flies past it, or how a gradual descent enhances the reveal of a landscape.
Without seeing these movements, it’s like trying to learn a dance from a written description.
How to Plan Your Drone Flyover Path
The magic of a great flyover shot starts long before you power up the drone. Careful planning is the bedrock of a successful and safe flight. It’s about visualizing the final footage and then working backward to figure out the exact steps to get there.
This isn't just about flying; it's about directing a small aircraft with a camera to tell a visual story.
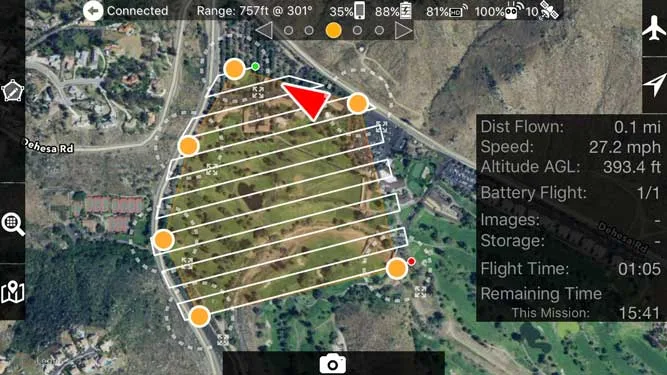
Image source: Bing (Web (fair-use with source credit))
Scouting the Location for Clear Airspace
Before you even think about your drone’s flight path, you need to thoroughly scout your location. This involves more than just checking if there's an open field. You're looking for potential hazards that could interfere with your planned flight or, worse, cause a crash.
- Obstacle Identification: Power lines, tall trees, antennas, and other structures are critical to note. You need to know their exact location relative to your intended flight path.
- Altitude Awareness: If your flyover involves descending or ascending, you need to be aware of how your altitude changes in relation to surrounding obstacles. Flying low over uneven terrain, for instance, can be risky.
- Environmental Factors: Wind can significantly impact drone control, especially at lower altitudes where it can be gusty. Consider prevailing wind directions and speeds.
Defining Your Start and End Points
Once you've assessed the location, you can start mapping out the actual path for your flyover. This is where you define the beginning and the end of your shot.
- Starting Position: Where will the drone be when the shot begins? This could be a wide, establishing view or a point from behind an object.
- Ending Position: Where will the drone be when the shot finishes? This might be a close-up on a subject or a transition to another flight pattern.
- Clearance: Ensure there's sufficient space between your start and end points, and any obstacles, for the drone to fly safely and smoothly.
Visualizing the Drone's Movement
With your start and end points set, you can now visualize the drone's journey between them. This is where you'll determine the speed, altitude changes, and camera movements needed for your desired effect.
- Speed Control: How fast do you want the drone to move? For cinematic flyovers, slower is generally better, allowing viewers to absorb the scene. Manufacturer specifications from DJI, for example, often indicate typical flight speeds for their models, with sport modes reaching up to 45 mph (72 km/h) and normal modes around 20 mph (32 km/h). For smooth flyovers, you'll likely be in the lower half of this range.
- Altitude Changes: Will the drone maintain a constant height, or will it ascend or descend during the flyover? A gradual descent can be a powerful way to reveal a subject.
- Camera Framing: As the drone moves, how will the camera be positioned? Will it stay locked on a point, or will it pan or tilt to follow the action or maintain framing?
Mastering the Drone Flyover: Step-by-Step
Executing a smooth drone flyover involves a blend of precise manual control and leveraging the smart features built into most modern drones. It’s about translating your planned path into actual flight, ensuring the footage you capture is stable, cinematic, and exactly what you envisioned.
Manual Flight Techniques for Smoothness
Flying manually gives you the most direct control, which is essential for nuanced flyover shots. The key here is gentle, deliberate inputs on your controller’s joysticks.
- Smooth Stick Movements: Avoid jerky, sudden movements. Think of pushing the control stick for forward flight (pitch) with the same gentleness you'd use to depress a light switch, not slam a door. Small, consistent nudges are your best friend.
- Coordinated Movements: Often, a flyover isn’t just pure forward motion. You might need to subtly yaw the drone to keep your subject centered or use a slight roll to adjust your perspective. Practicing these coordinated movements in an open space is highly recommended.
- Altitude Management: If your flyover involves changing altitude, use the throttle stick (up/down) with the same smooth, controlled approach. Avoid rapid ascent or descent, as this can lead to choppy footage.
Image source: Bing (Web (fair-use with source credit))
Leveraging Intelligent Flight Modes
Many drones come equipped with "Intelligent Flight Modes" designed to automate complex movements, making professional-looking shots far more accessible. For flyovers, Waypoint Navigation is particularly powerful.
- Waypoint Navigation: This mode allows you to pre-program a flight path on a map within the drone's app. You can set multiple points (waypoints), define the drone's altitude, speed, and gimbal angle at each point, and then initiate the flight. The drone will then autonomously follow this precise path, ideal for repeatable flyovers or complex sequences.
- QuickShots: While not always a direct "flyover," some QuickShots (like Dronie, which flies backward and upward) can initiate a cinematic movement that you can follow up with a manual flyover. They’re great for getting dynamic motion quickly.
Fine-Tuning with Gimbal Control
The drone’s camera gimbal is crucial for achieving a polished flyover. Even with smooth drone flight, the gimbal ensures the camera remains stable and can be used creatively.
- Subject Framing: As the drone moves horizontally, you’ll often need to subtly pan or tilt the camera to keep your subject perfectly in frame. This is distinct from the drone's own movement.
- Smooth Transitions: Gentle panning or tilting of the camera can add another layer of dynamism to your flyover, guiding the viewer's attention. Practice making these camera movements smoothly, synchronized with the drone's flight.
Common Mistakes in Drone Flyovers and How to Fix Them
Even with careful planning, beginners often stumble into common pitfalls that can ruin an otherwise good flyover shot. Recognizing these errors beforehand is half the battle, allowing you to proactively avoid them. The goal is always to make the drone’s movement feel intentional and smooth, not accidental or jarring.
Avoiding Jittery Footage
Jittery footage is the most common complaint for aspiring drone pilots trying to capture smooth flyovers. This often stems from overly sensitive controller inputs or external factors like wind. If your drone’s flight controls are too sensitive, even the slightest tremor of your hand can translate into significant camera shake.
- Controller Sensitivity Tuning: Check your drone's companion app for settings related to stick sensitivity. Reducing these values makes the controls less responsive, requiring more deliberate input for any given movement. This allows for finer control over speed and direction.
- Environmental Factors: Wind is a major culprit for jittery footage, especially when flying at lower altitudes. Even a light breeze can push the drone around, causing the camera to shake. If conditions are too windy, it’s often best to postpone the shot.
Navigating Obstacles Safely
Flying too close to obstacles during a flyover is not only a risk to your drone but also a common cause of bad shots. If you're forced to make sudden evasive maneuvers, your footage will become unstable.
- Maintain Safe Distances: Always adhere to recommended safe distances from buildings, trees, and other structures, as outlined in manufacturer guidelines and aviation regulations. For example, some regulations suggest maintaining at least 100 feet (30 meters) horizontally from uninvolved persons and structures.
- Visual Line of Sight (VLOS): You must always keep your drone in sight during flight. This is not just a safety measure but a legal requirement in most regions. If you can't see your drone clearly, you can't effectively navigate around obstacles or judge its proximity to them.
- Pre-flight Obstacle Mapping: Before you fly, use satellite imagery or drone mapping apps to get a detailed understanding of the terrain and any potential obstructions you might encounter along your planned flyover path.
Key Safety, Legal, and Compliance Considerations
Flying a drone, especially for cinematic shots like flyovers, comes with responsibilities. Ensuring your flight is safe and legal is paramount, protecting both yourself and others. Ignoring these aspects can lead to fines, accidents, or loss of your drone.
- Regulatory Compliance: Always understand and adhere to the drone regulations in your specific operating area. This includes registration requirements, airspace restrictions (like those near airports), and rules about flying over people or property. For example, in the United States, the Federal Aviation Administration (FAA) sets forth these rules. As of 2026, regulations continue to evolve, so staying updated is key.
- Visual Line of Sight (VLOS): This is a non-negotiable safety and legal requirement in most countries. You must be able to see your drone with your own eyes at all times during flight. If you rely solely on the First Person View (FPV) screen, you may lose awareness of surrounding hazards.
- Remote ID: Many countries are implementing Remote ID requirements for drones. This broadcasts identification and location information, allowing authorities to identify drones in flight. Ensure your drone complies with these mandates.
Pro Tips for Epic Drone Flyover Footage
Beyond the basics, a few advanced techniques can elevate your drone flyover shots from good to absolutely stunning. These tips focus on enhancing the visual appeal and narrative quality of your footage.
- Embrace the Golden Hour: Shooting during sunrise or sunset provides warm, soft light that adds a magical quality to any scene. The long shadows and gentle hues make landscapes and structures appear more dramatic and inviting.
- Vary Your Camera Angle: While it's a flyover, you don't have to keep the camera perfectly level. A slight downward tilt can emphasize the terrain, while a slight upward tilt can highlight the sky or taller structures.
- Use Waypoints for Repeatability: If you need to capture the same flyover shot multiple times or from slightly different angles, Waypoint Navigation is invaluable. You can save paths and easily replicate them, ensuring consistency for edits.
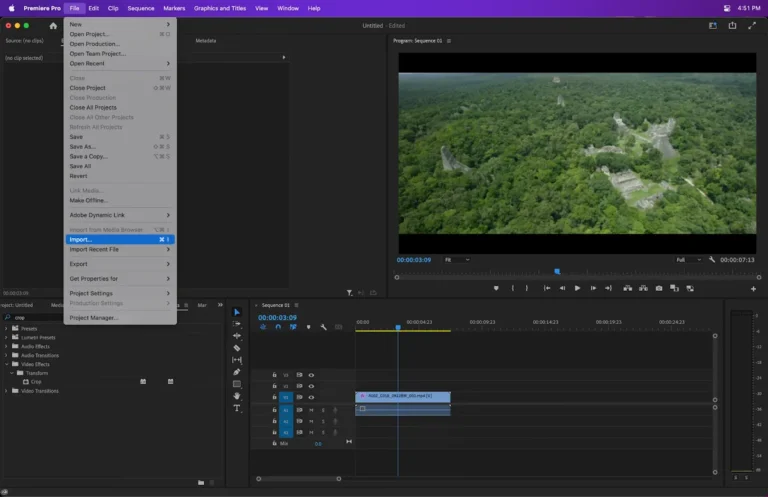
- Layer Your Shots in Post-Production: Consider shooting multiple flyover paths from different altitudes or angles. These can be layered or cut between in video editing software to create a more dynamic and comprehensive story.
Frequently Asked Questions About Drone Flyovers
How fast should I fly for a drone flyover?
For most cinematic flyover shots, slower speeds are better. Aim for a speed that allows viewers to appreciate the details of the scene without feeling rushed. Speeds between 5-15 mph (8-24 km/h) are often ideal, but this can vary based on the drone and the desired effect.
Can I fly a drone flyover indoors?
Flying a drone flyover indoors is possible but significantly more challenging and risky. It requires expert piloting skills, a smaller drone, and thorough pre-flight planning to account for limited space and numerous obstacles. Always prioritize safety and ensure you have permission to fly in the indoor space.
What's the difference between a flyover and a fly-by?
A flyover typically refers to a drone moving horizontally over a subject or landscape. A fly-by, on the other hand, usually describes the drone flying past a specific point or subject, often at a consistent distance. Both involve horizontal movement but differ in their framing and objective.
Do I need special software for Waypoint Navigation?
Waypoint Navigation is usually an integrated feature within the drone manufacturer's official mobile app. You don't typically need separate software, but you do need the app installed on your smartphone or tablet to plan and execute waypoint missions.