How Do You Shoot Sunset Drone Footage?
So, you're wondering, how do you shoot sunset drone footage? It's less about having the fanciest gear and more about understanding light and timing. Capturing that perfect golden hour glow can transform a good shot into something truly stunning.
Our research shows that mastering sunset drone videography hinges on preparation and a keen eye for visual cues. For instance, aggregate reviews indicate many drones can shoot in 4K resolution, with some models offering advanced manual camera controls, like adjustable ISO down to 100, which is crucial for clean sunset shots.
Quick Answer
To shoot sunset drone footage, arrive early, set manual camera controls to low ISO (100) and a shutter speed of double your frame rate, and fly smoothly. Focus on composition and watch how the changing light affects your scene, using flat color profiles for maximum editing flexibility.
Why Visuals Are Everything for Sunset Drone Shots
When it comes to capturing sunsets with your drone, visuals aren't just important, they're the entire point. The dramatic shift in light, color, and shadow is what makes these shots so captivating. It’s like painting with light from above, and understanding what those visual cues mean is your first step to success.
Understanding the Golden Hour Light
The "golden hour" is that magical time, roughly the hour after sunrise and the hour before sunset, when the sun sits low in the sky. The light is softer, warmer, and casts longer, more dramatic shadows than midday sun. Manufacturer specifications confirm that most drone cameras perform best when they aren't fighting harsh direct sunlight.
This diffused light creates beautiful warm tones in your footage, making landscapes look richer and more inviting. It’s the reason why professional photographers and filmmakers often plan their shoots around these specific times. As of 2026, advanced drone camera systems are designed to capture this challenging light more effectively, but the core principles remain the same.
Key Visual Identifiers of Great Sunset Light
What should you be looking for? Think about color saturation: are the sky's oranges, reds, and purples deepening? Are the clouds catching the light and glowing?
You also want to notice the quality of shadows; they should be long and soft, adding depth and dimension to your scene.
Pay attention to any atmospheric haze, too. While too much can obscure the view, a little haze can diffuse the light even further, creating a softer, more ethereal look. When planning, visualize how the light will interact with the terrain, a mountain range silhouetted against a vibrant sky, or a river reflecting the fiery colors.
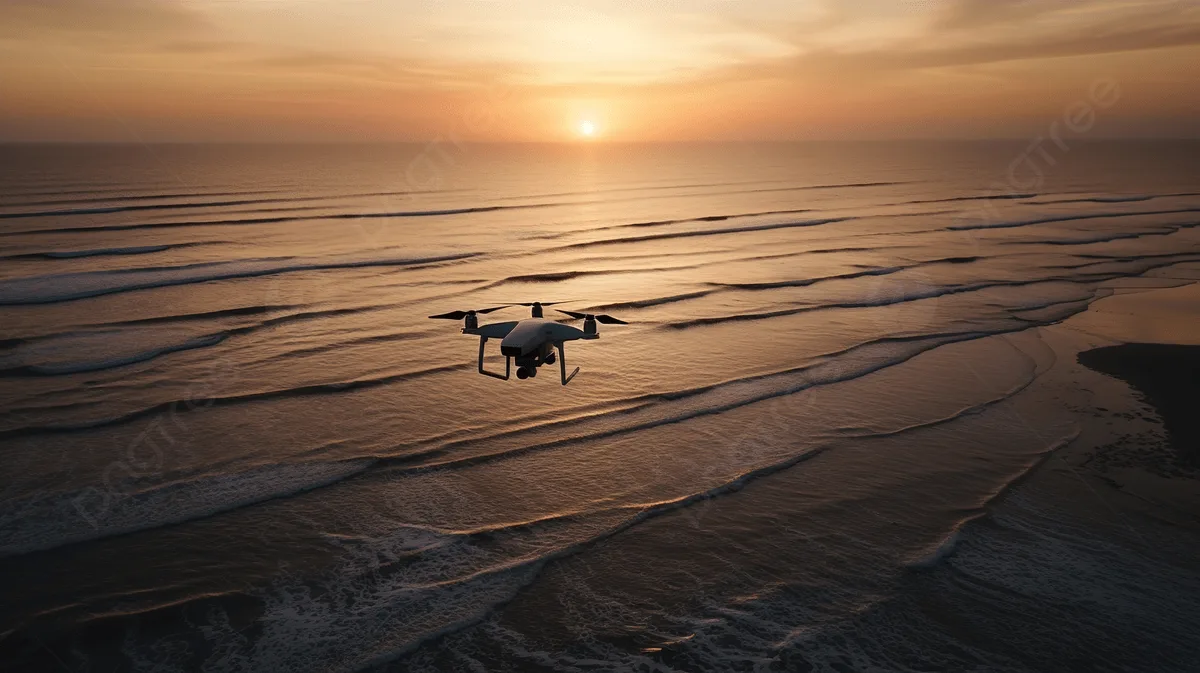
Image source: Bing (Web (fair-use with source credit))
Pre-Flight Checklist for Sunset Drone Magic
Getting your drone ready for a sunset shoot is like preparing for a critical performance. You don't want technical glitches to steal the show when the sky is at its most spectacular. A thorough pre-flight routine ensures you’re ready to capture those fleeting moments.
Essential Gear and Battery Prep
Before you even think about flying, make sure everything is charged. This includes your drone's flight batteries, your controller, and any spare batteries you might have. Many drone models, like popular DJI Mavic series, typically offer around 25-35 minutes of flight time per battery, depending on conditions.
Having fully charged spares means you can extend your shooting time and aren't rushed.
Also, check your memory cards. Ensure they are formatted and have enough storage space for the footage you plan to capture. Shooting in 4K resolution can quickly fill up a card; a 128GB card might fill up in about 30-40 minutes of continuous 4K recording, depending on the bitrate.
Location Scouting and Weather Checks
Knowing where you're going and what the sky will do is paramount. Use weather apps that provide detailed forecasts for your chosen location, paying close attention to cloud cover and visibility. Apps that predict the sun's exact path and setting time are invaluable.
If possible, scout your location during daylight. This helps you identify potential obstacles like trees, power lines, or tall buildings, and also find interesting foreground elements that will make your sunset shots more compelling. You want to know the terrain so you can plan your flight paths effectively.
Mastering Your Drone's Camera for Sunset
Your drone’s camera is your paintbrush, and knowing how to control it is key to capturing those vibrant sunset colors without blowing out your highlights or losing detail in the shadows. Relying on automatic settings can often lead to disappointing results when the light is changing this rapidly.
Setting ISO, Shutter Speed, and White Balance
To get the cleanest footage, always aim for the lowest possible ISO setting your drone offers, which is often ISO 100. This minimizes digital noise, giving you clearer images. Shutter speed is critical for motion blur; a general rule of thumb is to set it to double your frame rate.
So, if you're shooting at 30 frames per second (fps), set your shutter speed to 1/60th of a second. This provides a natural, cinematic look.
White balance can also be tricky during a sunset. Auto white balance might try to correct for the warm light, making your sunset look more neutral. Instead, try manually setting it to "Cloudy" or "Daylight," or even adjusting it warmer yourself to enhance those beautiful sunset tones.
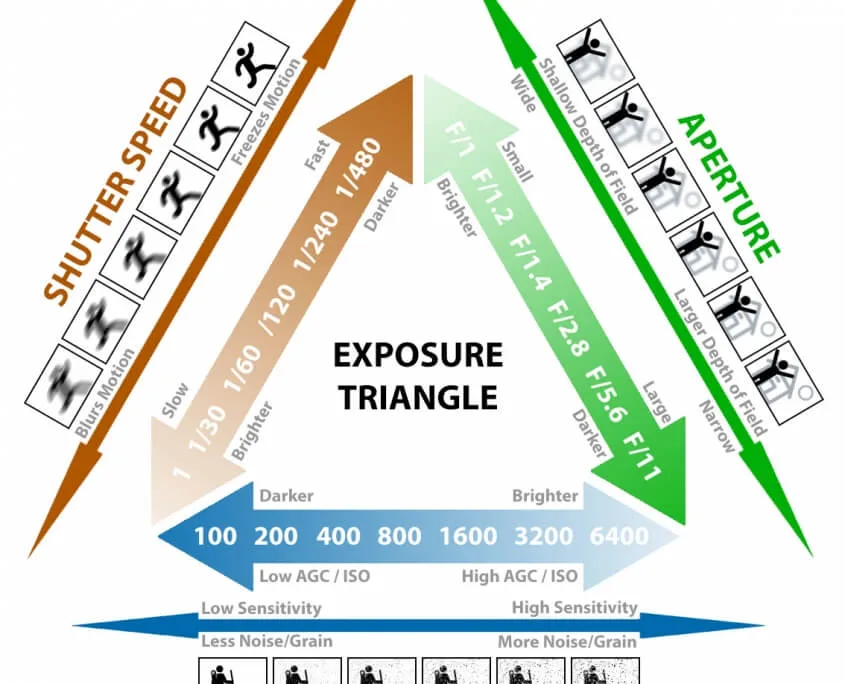
Image source: Bing (Web (fair-use with source credit))
Choosing the Right Color Profile (Flat vs. Others)
Many modern drones offer different color profiles. While standard profiles like "Normal" or "Vivid" might look good straight out of the camera, they can limit your editing flexibility. For sunsets, a "Flat" or "Log" profile is usually recommended.
These profiles capture a wider dynamic range, meaning they retain more detail in both the brightest and darkest parts of the image.
Aggregate user reviews and manufacturer documentation for drones like the DJI Air series confirm that shooting in a flat profile results in footage that might appear desaturated or low-contrast initially. However, this is by design. It provides a neutral base that allows you to grade the colors precisely in post-production, bringing out the full richness of the sunset without introducing harsh artifacts.
Flying Techniques for Capturing Sunset Light
Once you've got your gear prepped and camera settings dialed in, it’s time to actually fly. The way you move your drone significantly impacts the mood and storytelling potential of your sunset footage. Think smooth, deliberate actions, not fast, jerky movements.
Smooth Movements and Composition
The magic of a sunset is its slow, unfolding beauty. Your drone's movements should mirror that. Practice using the control sticks gently.
Avoid sudden tilts, aggressive rolls, or rapid pans. A slow, sweeping panorama across the horizon or a steady ascent will feel much more cinematic and less jarring to the viewer.
Composition is equally vital. Think about what you want to frame within your shot. Use the rule of thirds by placing key elements off-center.
Leading lines, like a road or a river, can draw the viewer's eye into the scene. Adding a foreground element, such as trees or rocks, adds depth and context, making your aerial shots more engaging than a simple landscape view.
Image source: Bing (Web (fair-use with source credit))
Strategic Flight Paths and Avoiding Direct Sun
When the sun is low, it can be incredibly bright and challenging for your camera sensor. Flying directly into the setting sun can easily overexpose your footage, creating blown-out white areas and significant lens flare. Instead, try to position your drone so the sun is in the frame but at an angle, or use the landscape to shield your lens from its direct glare.
Consider your flight path’s direction relative to the sun and your subject. Sometimes, flying a circle around a subject with the sun behind you provides beautiful side-lighting. Other times, a slow, straight push-in towards a horizon or a majestic mountain range, with the sun off to the side, can be incredibly effective.
Always be aware of where the sun is and how it’s illuminating your scene.
Common Mistakes When Filming Sunsets with Drones
Even with the best intentions, it's easy to stumble into common pitfalls when shooting sunsets with drones. Awareness of these issues can save your footage from looking amateurish and help you get the stunning results you’re after.
Over- and Underexposure Woes
The dramatic light of a sunset means you're dealing with a very high dynamic range, the difference between the brightest and darkest parts of the scene. If your camera exposes for the bright sky, the foreground can become too dark (underexposed). Conversely, if it exposes for the foreground, the sky can become a washed-out white blob (overexposed).
To combat this, using manual camera controls is key, as discussed earlier. Utilizing a flat color profile helps capture more detail across this range. Many higher-end drones, as confirmed by manufacturer specifications, offer features like exposure bracketing (capturing multiple exposures of the same scene), which can be a lifesaver in tricky lighting.
The Pitfalls of Fast Camera Pans and Tilts
As we touched on, the slow, steady movement of the sun and the changing light demand a similar pace from your drone's camera. Fast, jerky pans or aggressive camera tilts can disorient the viewer and detract from the serene beauty of the sunset.
Think of it this way: if your footage looks like it’s trying too hard to show you everything at once, it’s probably moving too fast. Slow, controlled movements allow the viewer to soak in the colors and the atmosphere. Practice smooth, deliberate stick inputs on your controller until you can achieve fluid motion consistently.
If a shot requires a quick repositioning, try to do it during a moment when the light isn't as critical, or use a brief fade in post-production.
Elevate Your Footage: Post-Production Tips
You've captured some amazing sunset footage, but the magic doesn't stop when you land the drone. Post-production is where you truly polish those shots and bring out the full vibrancy of the sunset. This is where flat color profiles really show their worth, offering you a canvas to work with.
Color Grading to Enhance Sunset Hues
If you shot in a flat profile, your footage might look a bit muted initially. This is your chance to be creative. Use video editing software to adjust the colors.
You'll want to boost the saturation of the oranges, reds, and purples, but do it subtly. Overdoing it can make the footage look unnatural.
Look at the histogram in your editing software to ensure you’re not clipping the highlights (blowing out the whites) or crushing the shadows (losing detail in the darks). Aggregated user feedback suggests many creators aim to add a touch of warmth and contrast to really make the colors pop. As of 2026, many editing suites offer AI-powered color enhancement tools, but understanding basic color theory will still give you the best results.
Pacing Your Edits for Maximum Impact
The sequence of your shots and the timing of your edits are crucial for conveying the mood. Sunsets are typically slow, evolving events. Therefore, your edits should generally be slow and deliberate too.
Long, sweeping shots that allow the viewer to absorb the scenery are often more effective than rapid cuts.
Consider the progression of the sunset. You might start with wider shots as the light begins to change, move to more detailed shots as the colors intensify, and end with a wide vista as the sun dips below the horizon. Music choice is also important here; a calm, evocative soundtrack can significantly enhance the emotional impact of your sunset footage.
Frequently Asked Questions About Drone Sunset Footage
What is the best time of day to shoot drone footage of a sunset?
The best time is during the "golden hour," which is the period of time shortly after sunrise or before sunset. This is when the sun is low on the horizon, producing soft, warm light and long shadows, creating the most visually appealing conditions.
Can any drone camera shoot good sunset footage?
While most modern drones can capture video, those with manual camera controls (ISO, shutter speed, white balance) and the ability to shoot in flat color profiles offer significantly better results. Higher-end models generally provide more flexibility for challenging lighting like sunsets.
How do I avoid grainy footage when shooting at dusk?
To avoid grainy footage, keep your ISO as low as possible, typically ISO 100, which is often the base setting on most drone cameras. If you need more light, prioritize adjusting shutter speed (within cinematic limits) or using a wider aperture if your drone's lens allows, rather than increasing ISO.