How Do I Make Drone Footage Look Professional?
So, you're wondering, "How do I make drone footage look professional?" It's a question many drone pilots ask after reviewing their first few flight sessions. You’ve got the drone, you’ve captured some sweeping views, but they lack that polished, cinematic quality you see in documentaries or high-end productions.
The good news is that achieving that professional look isn't about owning the most expensive gear; it’s about understanding and applying specific techniques. Our research shows that mastering pre-flight planning, in-flight control, and post-production editing can dramatically elevate your aerial videography. For instance, manufacturer specifications often highlight the importance of shooting in a flat color profile, which, as per industry standards, provides up to 10-bit color depth for enhanced editing flexibility.
Quick Answer
Make drone footage look professional by planning shots, flying smoothly, and using manual camera settings. Color grading in post-production is essential. Avoid jerky movements and harsh light.
Shoot in flat profiles and use ND filters for best results.
Planning Your Professional Drone Shots: The Pre-Flight Strategy
You wouldn't bake a cake without a recipe, right? The same applies to great drone footage. The magic really starts long before your drone even leaves the ground.
This planning phase is where you lay the foundation for stunning, professional-looking aerials. Without a clear plan, you're essentially just hoping to stumble upon good shots, which rarely happens consistently.
This stage involves understanding what you want to film and how you want to present it. It’s about thinking like a cinematographer, not just a hobbyist.
The Storyboard & Location Scout: Your Cinematic Blueprint
Before you even think about flying, you need to know what story you're telling and where you'll be telling it. A simple storyboard, even just a few quick sketches, can map out your key shots. This helps you visualize the flow and ensures you capture all the necessary angles.
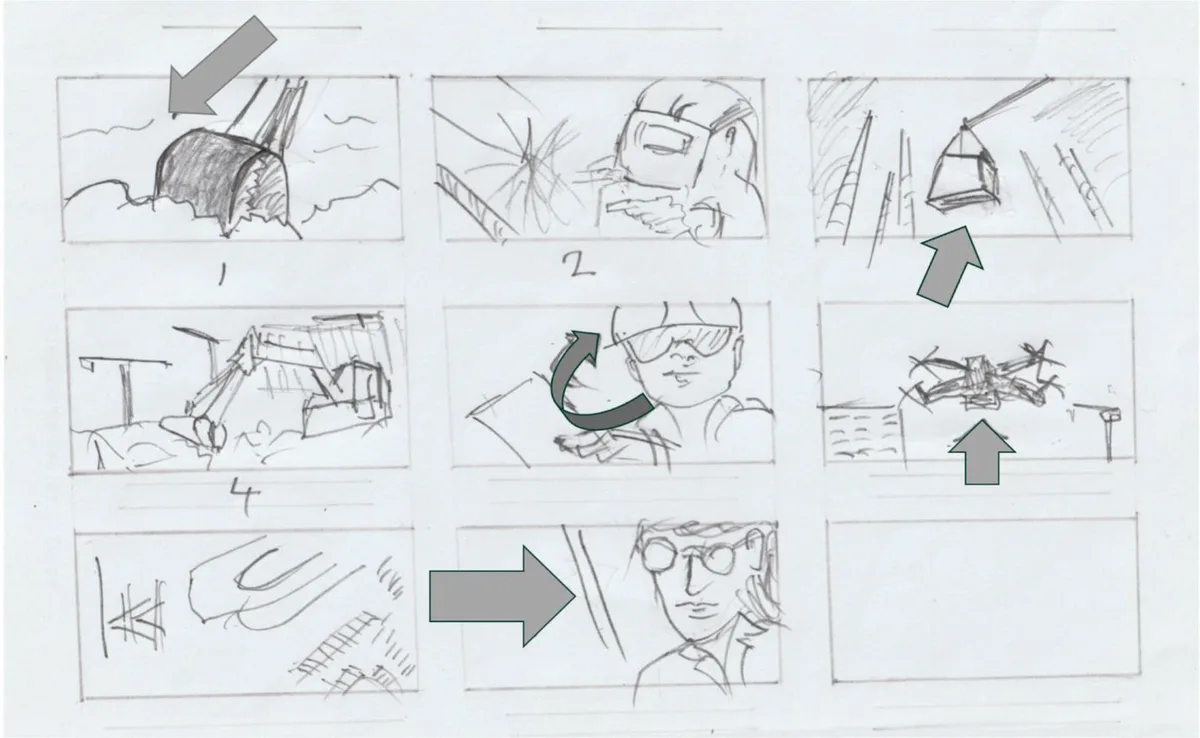
Image source: Bing (Web (fair-use with source credit))
Next, scout your location. This can be done virtually using tools like Google Earth or by visiting the site in person. Look for the best natural light, identify potential obstacles like trees or power lines, and pinpoint the most visually interesting perspectives.
Think about where the sun will be at different times of the day, this directly impacts your lighting.
Weather & Light: Nature's Key Ingredients
The time of day and weather conditions are your most powerful tools for creating mood and depth. Harsh midday sun creates strong, unflattering shadows and high contrast, which is difficult to edit. Instead, aim for softer light.
- Golden Hour: The period shortly after sunrise and before sunset offers warm, soft light that makes landscapes and structures look incredibly appealing. This is prime time for professional-looking shots.
- Overcast Days: While sometimes seen as less desirable, overcast skies provide diffused, even lighting that’s excellent for shooting details or when you need consistent color without harsh shadows.
Understanding these elements before you fly will save you a lot of frustration in post-production.
Smooth Operator: Mastering the Art of Drone Flight
Once you're in the air, how you fly is just as critical as where you point the camera. Jerky, erratic movements are a dead giveaway of amateur footage. Professional drone pilots focus on making their flights appear effortless and graceful, guiding the viewer's eye smoothly through the scene.
This section breaks down the core techniques for achieving that polished, cinematic feel in your flight paths and camera movements.
Gimbal & Stick Control: Achieving Cinematic Fluidity
The gimbal on your drone is what stabilizes the camera, but it's your control inputs that make the movement fluid. Think of your drone's control sticks like a sculptor’s tools, they require precision and a gentle touch.
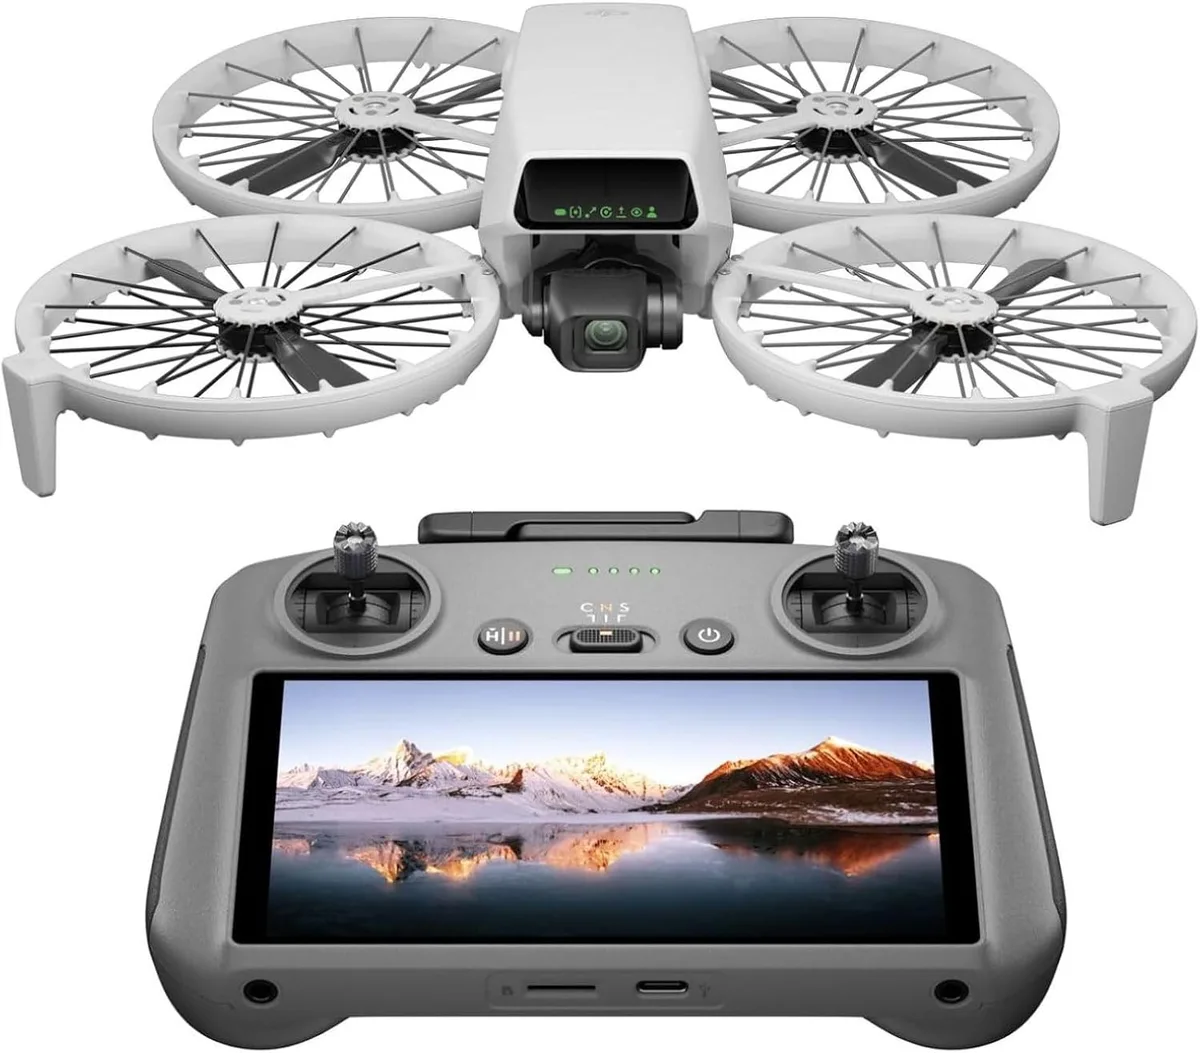
Image source: Bing (Web (fair-use with source credit))
- Slow, Deliberate Inputs: Avoid quick, sharp movements. Instead, use slow, steady pushes and pulls on the sticks.
- Gimbal Speed Settings: Most drone controllers allow you to adjust the speed of the gimbal's pan, tilt, and roll. Dialing these down to a slower setting (e.g., 20-40% speed) is key for smooth, cinematic motion.
- Practice Basic Maneuvers: Practice flying in a perfectly straight line, making gradual, sweeping turns, and smoothly ascending or descending. These fundamental skills are the building blocks of complex shots.
Key Flight Maneuvers for Professional Polish
Beyond basic control, certain flight patterns are hallmarks of professional aerial cinematography. Incorporating these thoughtfully can significantly enhance your footage.
- Dolly Zoom: This effect, also known as the "Vertigo effect," involves moving the drone forward or backward while simultaneously zooming the camera in the opposite direction. It creates a disorienting yet captivating visual.
- Reveal Shots: Start with a close-up on a subject or object and slowly fly backward, revealing a larger landscape or scene. This builds anticipation and provides context.
- Orbit Shots: Smoothly circle a subject, a building, a landmark, a person, creating a dynamic, 360-degree view. Ensure your camera stays locked onto the subject.
Height, Speed, and Composition: The Visual Storytelling Triangle
The height at which you fly and the speed at which you move directly influence the story your footage tells. Flying too high and fast can make a scene feel disconnected or overwhelming. Conversely, flying too low and slow might bore the viewer.
- Match Speed to Scene: For sweeping landscape shots, a moderate speed works well. For following action or a moving vehicle, you'll need to match its speed.
- Vary Altitude: Don't stay at one height for an entire clip. Mix wide establishing shots from higher altitudes with more intimate shots from lower levels.
- Rule of Thirds: Mentally divide your frame into nine equal sections using two horizontal and two vertical lines. Placing your subject or key elements along these lines or at their intersections often creates a more balanced and visually appealing composition than centering everything.
Dialing In Your Camera for Maximum Flexibility
Your drone’s camera is a powerful tool, but its effectiveness hinges on how you configure its settings. Shooting with automatic settings often leads to footage that’s difficult to work with later. For that professional polish, you need to take manual control.
This section focuses on camera settings that give you the most control during shooting and the most flexibility during editing.
Flat & Log Profiles: Unlocking Post-Production Potential
Many modern drones offer specialized color profiles designed for post-production workflows. Shooting in a "flat" or "log" profile (like D-Log, HLG, or Cinelike) captures a wider dynamic range and more color information than standard profiles.
- What It Means: Footage shot in these profiles will look desaturated and low-contrast, almost "washed out," straight off the drone. This is intentional.
- The Benefit: This "flatness" means there's more data for your editing software to work with. You can push and pull the colors and contrast much further in editing without degrading the image quality. Manufacturer specifications often indicate these profiles can support up to 10-bit color depth, which is crucial for smooth color transitions and avoiding banding.
Essential Camera Settings: Shutter Speed, ISO, White Balance
Beyond color profiles, other core settings are vital for professional output.
- Shutter Speed (The 180-Degree Rule): For natural motion blur that looks realistic to the human eye, your shutter speed should ideally be double your frame rate. If you're shooting at 30 frames per second (fps), aim for a shutter speed of 1/60th of a second. If shooting at 60 fps, aim for 1/120th. This prevents footage from looking too sharp or "stuttery."
- ISO: Keep your ISO as low as possible, typically 100. Higher ISO values introduce digital noise (grain), which is a major detractor from a professional look. Only increase ISO if absolutely necessary in very low light conditions.
- White Balance: Auto white balance can cause colors to shift unexpectedly between shots or even within the same shot if lighting conditions change. For consistent colors, set your white balance manually based on the lighting (e.g., Daylight, Cloudy, Shade) or use a custom white balance if your drone allows.
The Power of ND Filters: Mastering Exposure in Bright Light
As mentioned, the 180-degree rule for shutter speed is key. However, on bright, sunny days, achieving that ideal shutter speed (like 1/60th at 30fps) might be impossible without overexposing the image. This is where Neutral Density (ND) filters come in.
- What They Do: ND filters act like sunglasses for your drone's camera, reducing the amount of light entering the lens.
- Why You Need Them: They allow you to maintain your desired shutter speed and frame rate even in bright conditions, ensuring you get that natural motion blur. They are essential for achieving a cinematic look when shooting in direct sunlight. Different strengths of ND filters (e.g., ND8, ND16, ND32) are available for varying light conditions.
Editing for Impact: Turning Raw Footage into Professional Video
You’ve captured some great shots, but the real transformation from amateur to professional happens in the editing suite. This is where you stitch your clips together, refine the look, and craft the final narrative. Don't underestimate the power of good editing; it can make or break your footage.
This section walks you through the essential steps and considerations for editing your drone footage to a professional standard.
Color Correction vs. Color Grading: Transforming Your Look
These are two distinct but crucial processes in post-production.
- Color Correction: This is about fixing basic issues to make your footage look natural and consistent. It involves adjusting exposure (making sure shots aren't too dark or too bright), setting the correct white balance, and ensuring colors look accurate. Think of it as making sure everything is "right" before you start making it "stylistic."
- Color Grading: This is where you apply a creative look or mood to your footage. You might want to give your landscape shots a warm, golden feel or a cool, dramatic tone. If you shot in a flat profile, this is where you'll apply the desired color palette. Experimenting with Look-Up Tables (LUTs) can be a starting point, but manual adjustments are often necessary for the best results.
Pacing, Transitions, and Sound: The Finishing Touches
The flow of your video is dictated by pacing and transitions.
- Pacing: Vary the length of your clips. Longer, slower shots can build atmosphere, while shorter, quicker cuts can create energy or emphasize action. Avoid using the same shot length for every clip.
- Transitions: While simple cuts are often best for drone footage, occasional dissolves or fades can be used sparingly. Overusing flashy transitions screams amateur.
- Sound Design: Don't neglect audio. Adding subtle background music that complements the mood of your footage can make a huge difference. Consider ambient sounds recorded during the flight, too. Good audio is often as important as good visuals for creating an immersive experience.
Export Settings: Preserving Quality for Final Delivery
The final step is exporting your edited video. Your export settings determine the final quality and file size.
- Codec: H.264 is a widely compatible and efficient codec for delivery on platforms like YouTube or Vimeo. H.265 (HEVC) offers better compression but may not be supported everywhere.
- Bitrate: A higher bitrate generally means better quality but also a larger file size. For high-quality HD (1080p) footage, aim for a bitrate of around 15-25 Mbps. For 4K, you might aim for 50-80 Mbps or higher, depending on the platform.
- Frame Rate and Resolution: Ensure these match your project settings. Exporting at 24 or 30 fps and at the original resolution (e.g., 1920×1080 or 3840×2160) is standard. As of 2026, many platforms are supporting higher resolutions, so consider what your target platform offers.
Common Drone Footage Pitfalls & How to Sidestep Them
Even with the best intentions, there are common mistakes that can instantly make your drone footage look unprofessional. Recognizing these pitfalls is the first step to avoiding them and achieving that polished look. These are the quick indicators that someone might be new to aerial videography.
This section highlights the most frequent errors and provides straightforward advice on how to overcome them.
Avoiding Jerky Movements and Unstable Shots
The most obvious sign of amateur drone footage is unstable or jerky camera movement. This often comes from over-controlling the drone or not understanding how to smooth out inputs.
- The Problem: Rapid stick movements, sudden stops, or shaky gimbal adjustments create jarring visuals that distract from the scene.
- The Solution: Practice flying your drone in a controlled environment with slow, deliberate stick movements. As we discussed, reducing gimbal speed settings in your controller software is also crucial. If some instability persists even after careful flying, most editing software (like DaVinci Resolve or Adobe Premiere Pro) offers built-in stabilization tools that can help smooth things out in post-production.
The Problem with Harsh Lighting and How to Fix It
Shooting in direct, harsh sunlight is a common mistake that leads to unflattering footage.
- The Problem: Midday sun creates deep, dark shadows and blown-out highlights, resulting in a very high-contrast image with limited detail in the brightest and darkest areas. This also makes colors look less vibrant.
- The Solution: Prioritize shooting during the golden hours (early morning or late afternoon) for soft, warm light. If you must shoot in bright sun, use ND filters to control exposure and achieve a more cinematic look. Overcast days can also be a blessing in disguise for consistent, even lighting.
When "Too Much" Becomes Amateurish
Sometimes, pilots get excited about the capabilities of their drone and overdo it with complex maneuvers or excessive editing.
- The Problem: Rapid-fire cuts, overly complex spins and flips, or gratuitous use of filters and effects can overwhelm the viewer and detract from the actual subject.
- The Solution: Focus on telling a story with your footage. Simplicity is often best. Use smooth, intentional movements that serve the narrative. Keep editing effects minimal and purposeful. Remember, the drone and camera are tools to enhance your story, not just show off your flying skills.
Practice Scenarios: Putting It All Together
Theory is one thing, but seeing how these principles apply in real-world situations is where the true learning happens. Think about these common scenarios and how the planning, flying, and editing techniques we've discussed come into play. The goal is to build a repeatable process for consistently excellent results.
Scenario 1: Real Estate Marketing
You’re hired to film a luxury home for sale. The client wants it to look aspirational and highlight the property's best features.
- Planning: You'd scout the property at golden hour, noting the best angles for the house and the surrounding landscape. A storyboard might include a reveal shot of the facade, an orbit around the pool area, and a high-level shot showing the property's location within the neighborhood.
- Flying: Smooth, slow movements are critical here. A reveal shot from the street, an upward ascend from the backyard to show the scale, and precise orbits around architectural details would be key. You’d likely shoot at 30fps with a shutter speed of 1/60s, using ND filters to manage sunlight.
- Editing: Correct the colors to make the home look inviting. Grade the footage to enhance the warm, golden light. Use subtle transitions to link interior and exterior shots. The final video should feel serene and luxurious.
Scenario 2: Nature Documentary Segment
You need to capture breathtaking footage of a natural landscape for a documentary. The focus is on the scale and beauty of the environment.
- Planning: Identify key landmarks within the landscape. Plan shots that emphasize the vastness, think sweeping wide shots and slow, majestic fly-overs. Consider the time of day for dramatic lighting, like sunrise casting long shadows.
- Flying: Gentle, sweeping motions are paramount. A slow, steady ascent from a low vantage point to reveal a mountain range, or a long, straight fly-through of a valley, would be effective. Maintaining a consistent altitude and speed is crucial for narrative flow.
- Editing: Use color grading to enhance the natural beauty, perhaps boosting greens and blues. Ensure the pacing is slow and deliberate to allow viewers to absorb the scenery. Sound design might include natural ambient sounds of wind or wildlife.
Scenario 3: Event Coverage (Outdoor Festival)
Filming an outdoor festival requires capturing the energy and atmosphere while maintaining a professional look.
- Planning: Identify key areas, stages, crowds, vendor areas. Plan shots that show the scale of the event and the attendee experience. Consider how to move safely through crowded areas.
- Flying: This is where agility meets smoothness. You'll need to execute stable orbits around stages, slow pans across crowds, and dynamic follow shots of performers or attendees. Careful attention to flight paths is needed to avoid distracting the audience or crew.
- Editing: Edit with a quicker pace to reflect the event's energy. Use color correction to ensure consistent lighting across different stages and times of day. Music selection will be vital to capture the festival's vibe.
Camera Settings Deep Dive: Beyond the Basics
We touched on essential camera settings earlier, but let’s dive a bit deeper into why each one matters and how to optimize them. Getting these right in-camera saves immense work later and is a hallmark of professional aerial videography. It's about maximizing the data your drone's sensor captures.
The Nuances of White Balance
As mentioned, Auto White Balance (AWB) can be a big problem. It tries to guess the color temperature of the scene, and it can get it wrong or shift mid-shot.
- Why Manual is Better: If you’re shooting under consistent lighting, like a clear sunny day, setting white balance to "Daylight" is usually accurate. If it’s cloudy, use the "Cloudy" preset. These presets tell the camera what color temperature to assume, providing a stable baseline.
- Custom White Balance: For tricky mixed lighting or to achieve a specific look, use your drone’s custom white balance feature. This typically involves pointing the camera at a neutral gray or white surface under the exact lighting conditions you'll be filming in and telling the drone to use that as its reference.
Understanding Exposure Compensation
Even with manual settings, sometimes the overall scene is brighter or darker than your camera's meter anticipates. Exposure Compensation (+/- EV) allows you to fine-tune this.
- When to Use It: If your footage looks consistently too dark or too bright, even with manual ISO and shutter speed, use exposure compensation. A positive value (e.g., +0.7 EV) will make the image brighter, while a negative value (e.g., -0.7 EV) will make it darker.
- Balance is Key: Use this subtly. Extreme compensation can lead to clipping in highlights or shadows, negating the benefits of a flat profile.
The Benefit of Shooting at Higher Resolutions
Many modern drones can shoot in 4K (3840×2160 pixels) or even higher resolutions. While editing 4K footage requires more processing power, it offers significant advantages for professional output.
- Flexibility in Editing: Shooting in 4K allows you to crop or zoom into your footage in post-production by up to 200% while still maintaining a Full HD (1080p) output resolution. This can be like having a virtual zoom lens or stabilizing shaky footage by cropping in.
- Future-Proofing: As display technology advances, higher-resolution footage will look even better on future screens.
Post-Production Power: Color Grading and Sound Design
Editing isn't just about cutting clips together; it’s about shaping the emotional impact of your video. Color grading and sound design are the two most powerful tools you have in post-production to elevate your drone footage from looking merely recorded to looking intentionally crafted and professional.
Achieving a Consistent Look with Color Grading
As we discussed, shooting in flat profiles provides the raw material. Color grading is the artistry of transforming that raw material.
- Building a Look: Start with color correction to ensure your clips are balanced. Then, begin grading. This might involve subtle adjustments to warmth, saturation, and contrast. For example, if you shot a beach scene, you might enhance blues and yellows for a vibrant, sunny feel.
- Using LUTs Wisely: Look-Up Tables (LUTs) are pre-made color grading presets. They can be a good starting point, but rarely should you apply them without adjustment. Our research indicates that effective use of LUTs often involves applying one and then tweaking its intensity or making further manual adjustments to match your specific footage and creative vision.
The Impact of Sound Design
Poor audio can ruin even the most stunning visuals. Conversely, well-designed sound can immerse your audience.
- Music Choice: Select background music that matches the mood of your video. An upbeat track for an action sequence, a calm melody for a scenic panorama. Ensure the music doesn’t overpower any spoken narration or essential ambient sounds.
- Ambient Sounds: If you captured any clean ambient sound during your flight, wind, distant traffic, birdsong, these can add a layer of realism. Subtle use of these sounds can make your footage feel more grounded and immersive.
- Levels: Pay close attention to audio levels. Ensure music, narration, and sound effects are all balanced appropriately so nothing is too loud or too quiet.
Common Gear & Settings for Professional Drone Videos
While technique is king, having the right gear and understanding its capabilities is crucial. Certain settings and accessories are practically standard for anyone serious about professional drone videography. Investing in these can save you time and frustration in both shooting and editing.
The Indispensable ND Filter Kit
We’ve highlighted ND filters before, but it bears repeating: a good set of Neutral Density filters is non-negotiable for professional work.
- What to Look For: A kit that covers a range of strengths (e.g., ND8, ND16, ND32, ND64) is ideal. These allow you to maintain the 180-degree shutter rule in varying light conditions.
- Quality Matters: Opt for filters from reputable brands known for optical clarity and accurate color neutrality. Cheap filters can introduce color casts or reduce image sharpness.
Choosing the Right Memory Card
This might seem minor, but a slow memory card can lead to dropped frames or buffering, ruining your shot.
- Speed Class: Look for cards with high-speed ratings, such as V60 or V90. These offer sustained write speeds necessary for high-bitrate 4K video recording.
- Capacity: Consider larger capacity cards (64GB or 128GB) to avoid having to swap cards mid-shoot, especially for longer flight times or higher resolution recordings.
Controller & Software Considerations
Your drone controller and the accompanying app are your primary interface.
- Controller Screen: Many pilots prefer controllers with integrated bright screens that are easily visible in sunlight. This allows for better monitoring of camera settings and flight telemetry.
- Firmware Updates: Regularly updating your drone, controller, and app firmware is essential. Manufacturer updates often include performance improvements, bug fixes, and sometimes new features that can enhance your shooting capabilities. This is standard practice per most drone manufacturer’s recommended maintenance schedule.
Frequently Asked Questions
How long does it take to get proficient at smooth drone flight?
Proficiency varies by individual, but consistent practice for at least 10-15 hours is generally recommended to develop smooth control. Many find that dedicating 30 minutes a few times a week over a month yields significant improvements.
Should I always shoot in a flat or log profile?
While shooting in flat or log profiles offers maximum flexibility for color grading, it requires more post-production work. If you're new to editing or need footage quickly, a standard color profile might be sufficient, but it offers less room for creative adjustments later.
What's the best way to practice manual camera settings?
Start by shooting the same scene with different manual settings (e.g., varying shutter speed or white balance) and compare the results in editing. This hands-on approach helps you understand how each setting impacts the final image and builds your confidence.
How important is sound design for drone footage?
Sound design is surprisingly critical. Even subtle background music or ambient sounds can drastically enhance the mood and professionalism of your drone video. Without it, footage can feel empty and unfinished.