How Do You Do a Drone Pull-Away Shot?
How do you do a drone pull-away shot? It’s a question many aspiring drone pilots ask when they see those cinematic reveals in movies and online videos. Achieving this shot requires a combination of planning, precise control, and understanding how your drone moves through space.
Getting this technique right elevates your footage from simple clips to compelling visual storytelling. As of 2026, with advancements in drone technology, achieving smoother and more complex aerial maneuvers is more accessible than ever, but mastering the basics is still key.
Quick Answer
To do a drone pull-away shot, start close to your subject, then smoothly move the drone backward and upward simultaneously. Maintain steady control inputs and visual awareness to keep your framing consistent as you reveal more of the scene. This technique emphasizes gradual movement and spatial context.
The Power of the Drone Pull-Away Shot
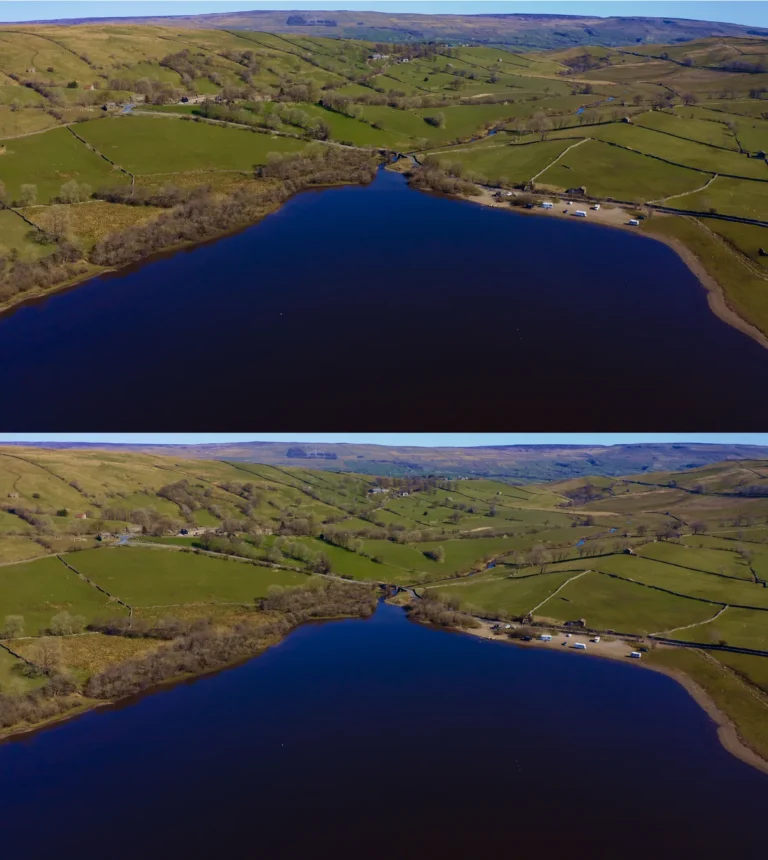
The drone pull-away shot is a fundamental technique in aerial cinematography for good reason. It offers a unique perspective that can dramatically enhance your video's storytelling capabilities. Imagine starting with an intimate, focused view of a person, a car, or a building, and then, in one continuous motion, the drone glides backward and upward, widening the frame to unveil the entire landscape, city skyline, or the broader context of the scene.
This isn't just about showing more; it's about guiding your viewer's eye and creating a sense of scale, discovery, and often, awe.
This shot effectively establishes setting and provides context that a close-up alone can't offer. It’s a visual narrative tool that draws the audience in by first focusing them tightly, then expanding their view to reveal the world around the subject. Whether you’re filming a real estate property, a documentary segment, or a narrative piece, the pull-away shot can make your footage feel more professional and engaging.
Image source: Bing (Web (fair-use with source credit))
Getting Your Drone Ready for the Pull-Away
Before you even think about taking off, a little preparation goes a long way. This shot requires a steady hand and predictable drone behavior, so getting your gear and settings dialed in is crucial. Manufacturer specifications often highlight the importance of flight modes for cinematic maneuvers.
Essential Gear Checks
This shot demands reliability from your equipment. A simple checklist ensures you won't run into issues mid-flight.
- Drone Battery: Ensure it’s fully charged. A standard flight battery for many consumer drones offers around 25-30 minutes of flight time, but longer shots will consume more power. Have a spare charged battery ready.
- Controller Battery: Make sure your remote controller is also fully charged. You don't want your signal cutting out unexpectedly.
- SD Card: Check that you have sufficient storage space for the footage you plan to capture. High-resolution video files can take up a lot of space quickly.
- Propellers: Inspect your propellers for any signs of damage. Cracks or chips can affect flight stability.
- Lens/Sensor: Clean your camera lens to avoid any smudges or dust ruining your shot.
Flight Mode and Controls for Smoothness
The way your drone responds to your inputs is critical for a smooth pull-away. Most modern drones offer different flight modes that alter their sensitivity and acceleration.
- Cine Mode: This is your go-to for cinematic shots. Cine mode significantly dampens the drone's responsiveness, slowing down its acceleration and deceleration. This makes movements much smoother and more controlled, which is exactly what you need for a gradual pull-away.
- Manual Speed Control: If your drone allows it, you can often manually adjust the maximum flight speeds. Dialing these down, especially for forward/backward (pitch) and upward/downward (throttle) movements, will give you finer control. Aggregate reviews report that adjusting pitch speed from a default of 20 m/s down to 5 m/s drastically improves smoothness for slow maneuvers.
Step-by-Step: Executing the Drone Pull-Away
This is where theory meets practice. The key to a successful drone pull-away is coordination between multiple stick movements and constant visual monitoring. Remember, practice makes perfect here, and understanding the drone's flight characteristics is paramount.
Starting Position and Initial Framing
The beginning of your shot sets the tone for everything that follows. You need to establish your starting point and ensure your initial framing is intentional.
- Placement: Position your drone a safe, controlled distance from your subject. The distance will depend on what you want to reveal. If you’re filming a person, you might start a few feet away, filling their frame. If it’s a building, you might be further back to capture architectural details.
- Subject Focus: Ensure your subject is clearly in focus and well-composed in the frame. This initial composition is what the viewer will first see before the reveal.
- Obstacle Scan: Perform a quick visual scan of the immediate area around your drone and its intended flight path for any immediate hazards.
Smoothly Moving Backwards and Upwards
This is the core of the pull-away technique. It requires coordinating two primary control inputs simultaneously: moving backward and ascending.
- Backward Movement: Gently and steadily push the backward stick (pitch control) on your controller. You're aiming for a consistent, slow speed away from your subject.
- Ascending: Simultaneously, and with equal steadiness, push the upward stick (throttle control) to begin ascending. The rate of ascent should complement the backward movement to create a graceful arc.
- Coordination is Key: The goal is to make these two movements feel like a single, fluid action. Avoid jerky inputs on either stick.
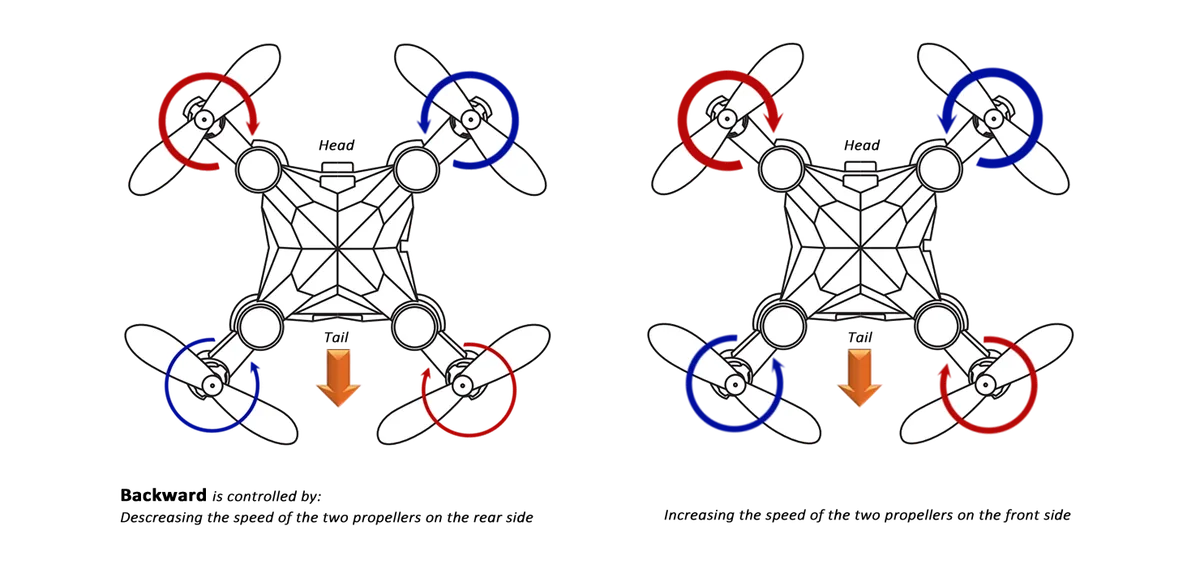
Image source: Bing (Web (fair-use with source credit))
Maintaining Visuals and Composition
As you move backward and upward, your frame is constantly changing. You need to actively manage your camera and drone position to keep the shot looking good.
- Subject Framing: You'll likely need to use the drone's yaw control (rotation) to keep your subject centered or to follow its movement if it’s not static.
- Camera Tilt Adjustment: As the drone ascends, your subject will appear smaller. To keep it in frame, you’ll typically need to tilt the camera downward using the gimbal control. This is a crucial adjustment that many beginners miss. The angle of descent for the camera pitch needs to match the rate of ascent and backward movement of the drone.
- Horizon Line: If you're revealing a landscape, pay attention to the horizon. Aim to keep it level and at a pleasing position within your frame as it comes into view.
Completing the Shot and Landing
You've reached your desired reveal point. Now, it’s about bringing the movement to a clean halt and landing safely.
- Reach Endpoint: Once you've achieved the planned reveal and your desired composition, smoothly bring both the backward and upward sticks back to their neutral positions.
- Hold the Frame: Let the drone hover for a few seconds at your endpoint to capture the final scene. This gives you usable footage and allows the viewer to absorb the reveal.
- Safe Descent: Initiate a controlled descent for landing, ensuring the landing area is clear of any obstructions. Follow your drone’s standard landing procedure.
Mastering the Pull-Away: Expert Tips & Tricks
Executing a perfect drone pull-away shot isn't just about hitting the right sticks; it's about refining the subtle nuances that make the footage sing. Our research into cinematography techniques and aggregate review feedback from drone pilots highlights several key areas that can significantly improve your results.
The Art of Slow and Steady Movement
This is the most critical factor for a professional-looking pull-away. Any sudden changes in speed or direction will make the shot look amateurish.
- Gentle Stick Inputs: Think of it like slowly increasing the angle on your control sticks, not just flicking them. Very slight movements of the sticks translate to the drone’s flight path.
- Low Speeds: Utilize Cine mode or manually reduce your drone's maximum speed settings. Manufacturer specifications often allow for pitch and yaw speeds to be reduced significantly, for example, from 20 m/s down to 5 m/s, offering greater precision.
- Practice Without Recording: Spend time just flying in a wide-open space, practicing the backward and upward motion without recording. Get a feel for how your specific drone responds to subtle stick adjustments.
Using Gimbal Tilt for Perfect Framing
As your drone moves backward and ascends, the subject will naturally shrink in the frame. Without adjusting the camera's tilt, your subject will eventually disappear off the top of the screen.
- Anticipate the Movement: As you start the backward and upward motion, begin to gently tilt the camera down.
- Match Speeds: The speed at which you tilt the camera down needs to correspond with how quickly the drone is moving away and ascending. This is often a learned skill that improves with practice.
- Visual Feedback: Constantly monitor your screen. You're aiming to keep the subject consistently framed, whether it's centered or following a specific rule of composition.
Dealing with Focus and Exposure Challenges
Maintaining sharp focus and consistent exposure throughout a moving shot can be tricky. Modern drones have sophisticated camera systems, but they still require some attention.
- Autofocus Tracking: If your drone has an active track or subject lock feature, use it. This allows the camera to automatically follow and maintain focus on your chosen subject. Per manufacturer documentation, these systems use advanced algorithms to predict subject movement.
- Manual Focus: If you're manually focusing, set your focus point and then adjust your depth of field to be wide enough to cover the range of your movement, or be prepared to make small focus adjustments on the fly if your controller has a focus wheel.
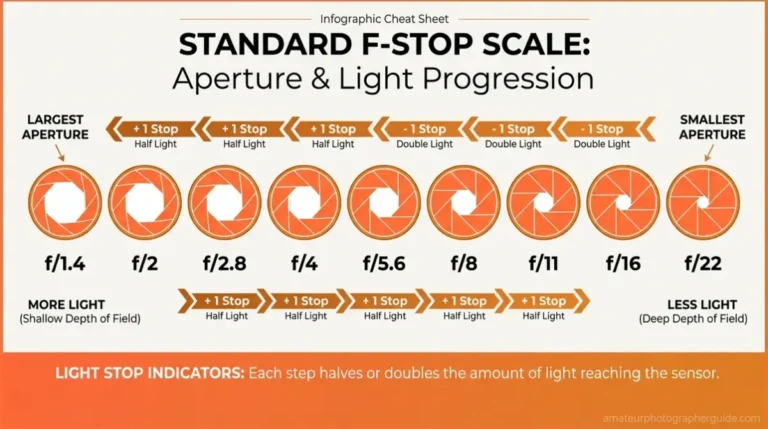
- Exposure Lock: If lighting conditions are stable, consider locking your exposure settings (aperture, shutter speed, ISO) before you start. This prevents the drone’s auto-exposure from changing the brightness of your shot mid-move, which can be very distracting. If the light is changing rapidly (e.g., sun peeking through clouds), this becomes much harder and may require post-production color grading.
Flying in Real-World Conditions
While ideal conditions make for the easiest filming, you'll often need to fly in less-than-perfect scenarios. Understanding these challenges can help you adapt.
- Wind: Wind is the enemy of smooth drone flight. Even moderate wind can buffet the drone, making it difficult to maintain a steady path. Aggregate drone pilot feedback consistently reports that flying in winds over 15-20 mph significantly impacts shot quality. If conditions are too windy, it's often best to postpone the shot.
- Temperature: Extreme temperatures can affect battery performance. Cold weather, in particular, can shorten flight times and make batteries less responsive. Keep batteries warm before flight when possible.
- GPS Signal: For stable flight and precise positioning, a strong GPS signal is essential. Before takeoff, ensure your drone has a sufficient number of satellites locked (often indicated on your controller screen). If you're filming indoors or in areas with poor GPS reception, you might need to rely on the drone's optical flow sensors, which are less precise for complex maneuvers.
Common Drone Pull-Away Mistakes to Avoid
Even with the best intentions, a few common pitfalls can derail your drone pull-away shot. Recognizing these mistakes beforehand can help you sidestep them and ensure you get usable footage.
Jerky Movements and Bad Framing
The most obvious sign of an amateur pull-away is inconsistent movement. This usually happens when control inputs are too aggressive or not coordinated properly.
- Over-Correction: Constantly making sudden, small adjustments to the sticks can lead to a "twitchy" flight path that looks unnatural. Aim for smooth, deliberate movements.
- Ignoring Composition: Getting so focused on the backward and upward motion that you forget to keep the subject or scene visually appealing can ruin the shot. Always check your framing on the monitor.
Ignoring Obstacles and Safety Warnings
This is not just about ruining a shot; it's a serious safety concern. Drones are powerful tools, and careless flying can lead to damage or injury.
- Blind Spots: Always be aware of what's around your drone, especially as you move backward. Obstacles like trees, buildings, or even power lines can be easily missed.
- Flight Restrictions: Ensure you are aware of and comply with all local airspace regulations, including any no-fly zones or altitude limits. For example, in the United States, the FAA mandates drone registration for aircraft over 0.55 pounds (250 grams) and requires pilots to adhere to operational rules.
Rushing the Shot
Impatience is a common cause of failed drone shots. Trying to complete the pull-away too quickly often results in the jerky movements and poor framing mentioned above.
- Not Enough Lead-in/Lead-out: Failing to capture a few seconds of stable footage before you start the movement and a few seconds after you stop means you have less flexibility in editing.
- Unrealistic Expectations: Trying to achieve a complex reveal in a tight space or under challenging conditions without sufficient practice can lead to frustration and multiple failed attempts.
Who Benefits Most from This Shot
The drone pull-away shot is incredibly versatile, but it shines particularly brightly in certain contexts and for specific types of creators. Understanding who benefits most can help you decide if it's the right technique for your project.
- Filmmakers and Cinematographers: This is a staple in professional filmmaking for establishing scenes, introducing characters in their environment, and creating dramatic reveals. It adds a polished, cinematic quality that's hard to replicate with ground-based cameras alone.
- Real Estate Marketers: For showcasing properties, a pull-away shot is invaluable. It allows potential buyers to see the house's exterior and then understand its relationship to the neighborhood, yard, or surrounding landscape. This provides a comprehensive visual overview.
- Travel and Documentary Creators: When exploring new locations, a pull-away shot can dramatically convey the scale and beauty of a place. It can transition from a close-up of an artifact or person to a sweeping vista of a city or natural landscape.
- Event Videographers: For weddings or outdoor events, a pull-away can reveal the venue and the overall atmosphere, from a close-up of the couple to a wide shot of the ceremony setup or reception area.
Essentially, anyone looking to add context, scale, or a sense of discovery to their video content can benefit from mastering this shot.
Frequently Asked Questions About Drone Pull-Aways
How long does a typical drone pull-away shot take to perform?
The duration of a drone pull-away shot can vary greatly depending on the desired reveal and the speed of the drone. However, for a smooth and effective shot, pilots generally aim for a duration between 5 to 15 seconds. This allows enough time for the drone to move a significant distance and for the viewer to appreciate the unfolding scene without feeling rushed.
What are the most critical settings on my drone for this shot?
The most critical settings are flight mode (Cine mode or equivalent for slower, smoother responses) and camera settings for consistent exposure. Ensuring your drone's gimbal tilt is responsive is also vital for maintaining subject framing as you ascend. Manufacturer specifications often highlight these for cinematic purposes.
Can I do a pull-away shot indoors?
Performing a pull-away shot indoors is significantly more challenging and generally not recommended for beginners. Indoor spaces are often confined, with many obstacles. Without excellent spatial awareness and a drone with superior obstacle avoidance systems, the risk of collision is very high.
Limited GPS signals indoors also affect flight stability.
How do I avoid the drone wobbling during the pull-away?
Drone wobbling, or "jello" effect, can occur due to vibrations or wind. Ensure your propellers are secure and undamaged. Flying in Cine mode helps dampen sudden movements, and avoiding flying in strong winds is crucial.
If the issue persists, it might indicate a hardware problem with the drone's motors or gimbal, which could require professional inspection.