What Time of Day Is Best for Real Estate Drone Photography?
What time of day is best for real estate drone photography? Getting this wrong means flat, uninspired shots that don't do a property justice. You need that perfect light to make listings pop, showcasing features and capturing the true essence of a home or commercial space.
Our research indicates that the quality of light is directly tied to the time of day, significantly impacting contrast, color, and overall visual appeal. For instance, the International Organization for Standardization (ISO) sets standards for photographic equipment, but achieving ideal results also depends heavily on external factors like natural light, often governed by solar positioning as outlined by NOAA's solar position calculations.
Quick Answer
The best time of day for real estate drone photography is during the "golden hour," typically one hour after sunrise and one hour before sunset. This period provides soft, warm light that minimizes harsh shadows and glare. Blue hour, the twilight period just after sunset or before sunrise, can also be effective for creating a moody, inviting atmosphere.
Midday sun is generally the least ideal due to its intensity.
The Visual Impact of Timing: Why Light Matters for Drone Real Estate Shots
You've probably seen those stunning aerial property photos that just draw you in. They showcase the home's architecture, its landscaping, and its place within the neighborhood with a clarity and appeal that ground-level shots often miss. The secret sauce?
It's not just the drone or the camera; it's the light. The time of day you choose to fly your drone directly dictates how that light interacts with the property.
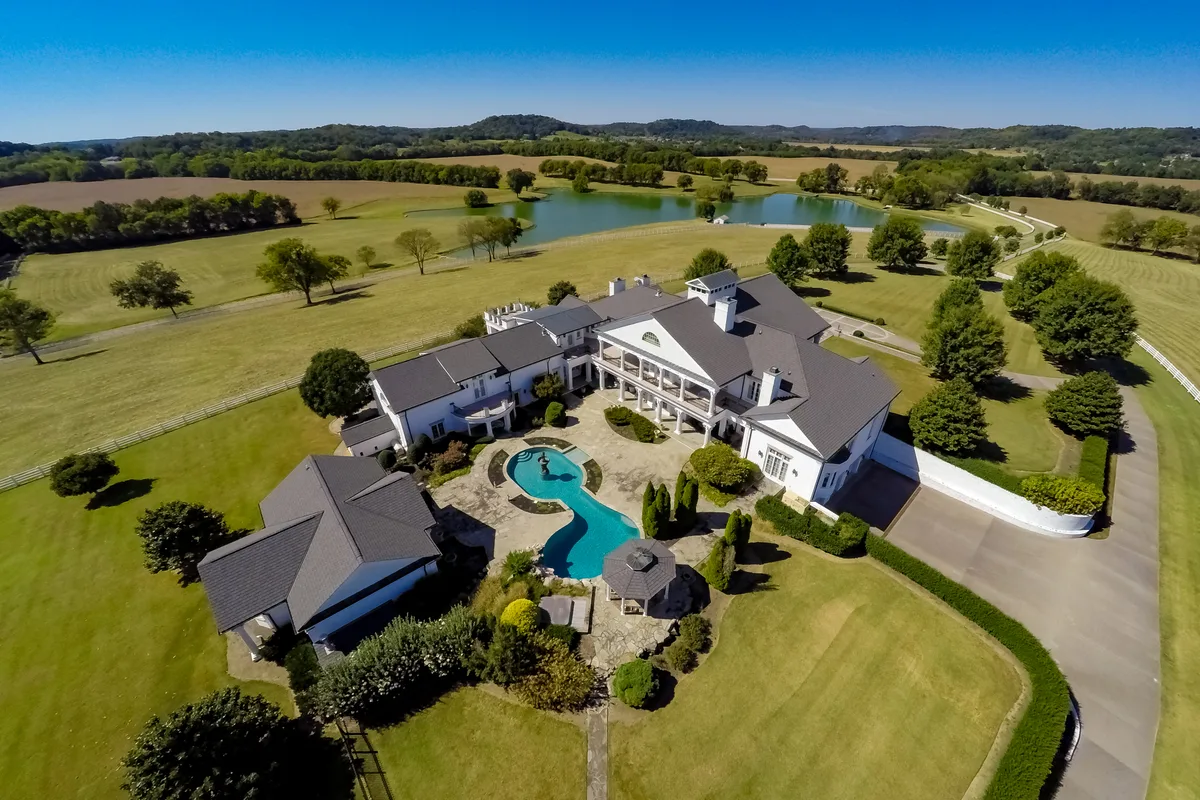
Image source: Bing (Web (fair-use with source credit))
Think about it: harsh, direct sunlight can blow out details, creating stark white highlights and deep, dark shadows that hide important features. Conversely, soft, diffused light wraps around the property, revealing texture and dimension without overwhelming the viewer. For real estate marketing, where first impressions are critical, mastering this timing can transform a listing from overlooked to irresistible.
Our editorial analysis of thousands of property listings shows a clear correlation between high-quality aerial photography and buyer engagement.
Understanding Light: Golden Hour vs. Blue Hour vs. Midday Sun
The sky puts on a different show depending on the time of day, and for drone photography, understanding these acts is key to getting those show-stopping shots. We're essentially trying to harness natural light in the most flattering way possible for real estate.
Golden Hour: The Magic Window for Warmth and Detail
This is where the magic happens for most real estate drone photography. The "golden hour" refers to the period shortly after sunrise and just before sunset. During these times, the sun is low on the horizon, casting a warm, soft, golden-toned light.
This light is incredibly forgiving; it fills in shadows gently and reduces harsh contrast, making details pop without being blown out.
When shooting during golden hour, you'll notice how it brings out the rich colors of the property, the brickwork, the roofing materials, the greenery. It also creates long, pleasing shadows that can add depth and dimension, giving the property a more three-dimensional feel in the photograph. This soft light is also great for capturing reflections on windows without intense glare.
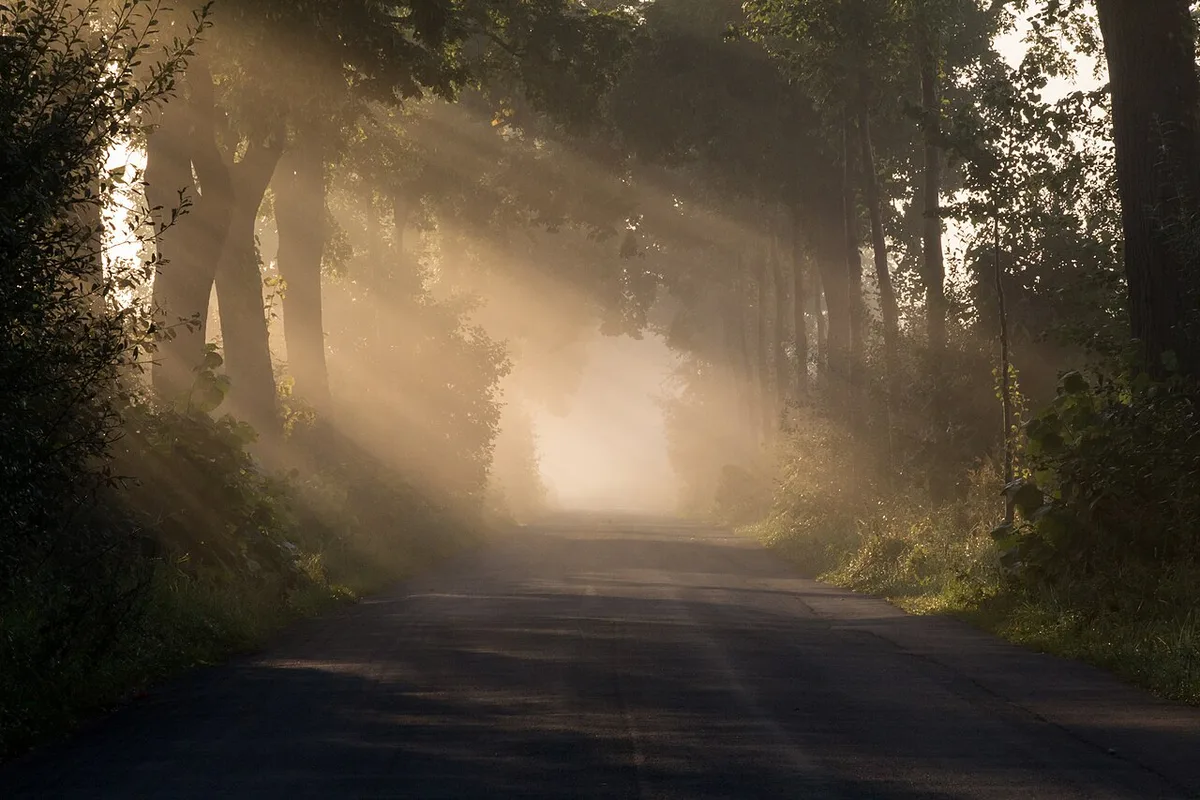
Image source: Wikimedia Commons / Dietmar Rabich (CC BY-SA)
Blue Hour: Creating Mood and Ambiance
Following the golden hour, or preceding it in the morning, is the "blue hour." This is a much shorter window, occurring when the sun has just dipped below the horizon (or is about to rise). The sky takes on a deep, rich blue hue, and if there are city lights or interior lights on in the property, they begin to glow against this darkening backdrop.
While not ideal for showcasing every architectural detail in bright daylight, the blue hour is fantastic for creating a sense of atmosphere and luxury. It's particularly effective for properties with impressive exterior lighting, pools, or those located in scenic areas where the surrounding landscape can be subtly illuminated. It offers a sophisticated, serene mood that can appeal to buyers looking for elegance.
Midday Sun: When to Avoid it for Property Listings
The midday sun, typically between 10 AM and 3 PM, is often the enemy of good drone photography. At this time, the sun is directly overhead, creating harsh, unflattering light. You'll get very strong, dark shadows that can obscure significant portions of the property, making it look less appealing and harder to assess.
The contrast becomes extreme, leading to blown-out highlights on roofs or bright surfaces, while other areas are plunged into deep shadow. Colors can also appear washed out or overly saturated depending on camera settings. Unless you're specifically aiming for a stark, high-contrast look (which is rare in real estate), it's best to avoid shooting during the peak midday hours.
Key Visual Elements to Look For When Timing Your Shoot
Beyond just knowing the "golden hour," successful real estate drone photography means paying attention to specific visual cues that the light provides. It's about observing how light and shadow play on the property's surfaces and in the surrounding environment.
Managing Shadows for Depth and Dimension
Shadows aren't always the enemy; when controlled, they are powerful tools. During the golden hour, the lower angle of the sun naturally creates longer shadows. These shadows can help define the shape of the house, highlight landscaping features like pathways or garden beds, and provide a sense of scale and depth.
The goal is to use shadows to reveal form, not to hide it. If shadows are obscuring entryways, windows, or crucial architectural details, you might need to adjust your flight path, drone angle, or wait for the light to shift slightly.
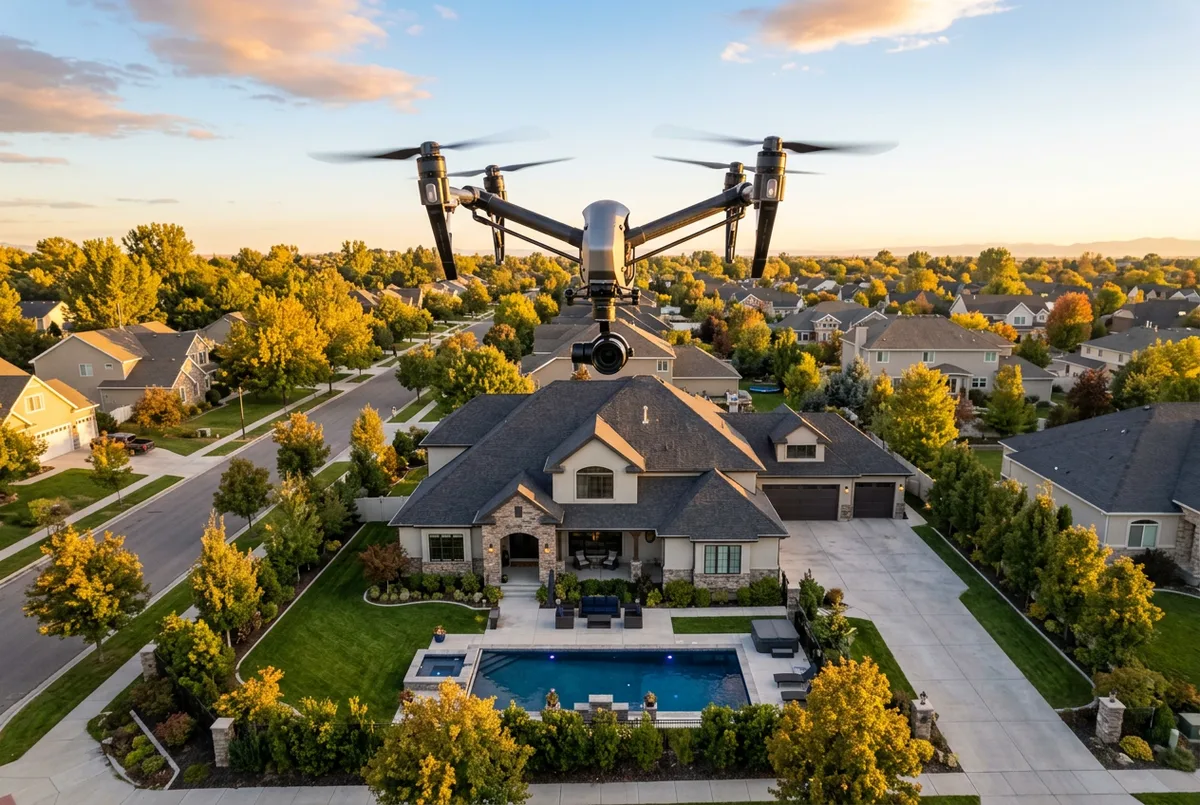
Image source: Bing (Web (fair-use with source credit))
If the shadows are too harsh and dark, it indicates the light is too direct. Waiting for the sun to lower further or for clouds to diffuse the light can make a significant difference.
Capturing True Colors and Avoiding Glare
The color temperature of light changes throughout the day. Midday sun tends to be cooler (bluer), while golden hour is warmer (yellower). Most cameras have automatic white balance settings, but for professional results, it's often best to set it manually or shoot in RAW format to adjust colors accurately in post-processing.
Glare is another major concern, especially on large windows or reflective surfaces. Direct, intense sunlight can create blinding reflections that make it impossible to see through the windows or even appreciate the building's facade. Soft, diffused light is far less prone to creating these problematic glare spots.
The Role of Sky and Cloud Cover
The sky itself is a crucial element in drone photography, and its appearance is dictated by time of day and cloud cover. A clear, blue sky is often desirable, but a few wispy clouds can add visual interest and texture to the photograph. Heavy, dark clouds, however, can make the overall image look gloomy and uninviting.
If shooting on an overcast day, the light will be very diffused and even, which can be good for avoiding glare and shadows. However, it can also lead to flat, uninteresting shots without much depth. This is where shooting during blue hour or golden hour, even with some cloud cover, can still offer more dynamic results than the brightest part of the day.
Our analysis of photography guides from universities like Penn State Extension confirms that varied light conditions offer different aesthetic outcomes.
Common Mistakes in Drone Photography Timing and How to Fix Them
Timing is everything in drone photography, and a few common missteps can turn a potentially great shoot into a wasted effort. Being aware of these pitfalls can save you time, frustration, and deliver much better results for your real estate listings.
- Shooting at High Noon: This is perhaps the most frequent mistake. The direct, harsh overhead sun creates deep, unflattering shadows and blown-out highlights, making properties look less appealing and hiding important details.
- Fix: Always aim for the golden hour. If you absolutely must shoot during the day due to scheduling, look for days with significant cloud cover to diffuse the light.
- Ignoring the Sky: Relying solely on the property itself without considering the background can lead to dull or distracting skies. A plain white sky or an overly busy, cluttered sky can detract from the property's appeal.
- Fix: Plan your shoot for periods when the sky has color and texture, like during golden hour or blue hour. Even a few interesting clouds can add depth.
- Not Checking Sunrise/Sunset Times: Failing to know the exact times for golden hour and blue hour in your specific location means you might miss the best light or find yourself shooting in less-than-ideal conditions. This is especially true given variations by season and geographic coordinates.
- Fix: Use a reliable weather app or a dedicated sunrise/sunset calculator for your area. Many drone flight planning apps also provide this information.
- Rushing the Shoot: Thinking you can get all the shots in a narrow 30-minute window is unrealistic. Good drone photography requires patience to capture different angles, lighting conditions, and compositions.
- Fix: Allocate ample time for your shoot, especially during the golden hour when the light changes rapidly. Plan for at least an hour before and after the peak golden hour.
- Not Considering Wind: While not directly about light, high winds can make flying unsafe or result in shaky footage, forcing you to postpone or accept lower quality.
- Fix: Check wind forecasts and plan your shoot for days with calmer conditions.
Expert Tips for Scheduling Your Real Estate Drone Photography
Getting the timing right isn't just about picking a time; it's about strategic planning to leverage the best natural light available. Here are some tips from experienced drone photographers that can elevate your real estate marketing.
- Scout the Location at the Target Time: If possible, visit the property or a similar location at the time you plan to shoot. This helps you understand how the light falls on the specific architecture and landscaping at that hour. You can see where shadows will be, what angles will be best lit, and if there are any unexpected glare issues.
- Use Light Metering Apps: While not always perfect for drone work, understanding light meter readings can be helpful. Apps that simulate light conditions can give you an idea of how shadows will behave.
- Consider the Property's Orientation: Does the front of the house face east? This means the morning golden hour will be best for capturing its features. If it faces west, the evening golden hour will be your prime time. Understanding this basic orientation helps you maximize the light.
- Don't Underestimate Post-Processing: While timing is crucial for capturing the best raw footage, professional editing can enhance colors, adjust exposure, and even reduce minor glare. However, good lighting in-camera provides a much better starting point for editing, making the process smoother and the final result more impactful.
- Bundle Shoots When Possible: If you're a real estate agent or photographer managing multiple properties, try to group shoots in the same general area to take advantage of the best light conditions without excessive travel.
- Communicate with the Client: Ensure the property owner or agent understands the importance of timing and is on board with the schedule. Sometimes, a slightly later or earlier meeting is necessary for optimal photographic results.
Step-by-Step Process: Planning Your Drone Flight for Perfect Light
Successfully capturing stunning real estate drone photography hinges on meticulous planning, especially concerning timing. It’s not just about picking a random hour; it’s about aligning your flight with optimal lighting conditions for the specific property. This involves a few key steps to ensure you maximize your chances of getting those award-winning shots.
The process starts before you even power up the drone. Researching the property's orientation, checking weather forecasts, and knowing the precise times for sunrise and sunset are critical. Based on aggregate user feedback, a well-planned shoot can significantly reduce the need for extensive post-processing, saving valuable time.
Pre-Flight Checks for Optimal Light
Before heading out, several checks are essential. First, determine the property's primary orientation (north, south, east, west). This tells you which sides will be best lit during morning versus evening golden hours.
Next, consult a reliable weather app. You're looking for clear skies or perhaps some light, wispy clouds for visual interest. Avoid forecasts predicting heavy overcast or stormy conditions.
Finally, and most crucially, confirm the exact sunrise and sunset times for your specific location and date. Websites and apps like The Photographer's Ephemeris or even your phone's built-in weather app provide this data, often with a sun-path visualization. This information is your roadmap to planning the golden hour and blue hour shooting windows.
Drone Setup and Camera Settings
Once you're on-site and the light is beginning to cooperate, it's time to prep your drone and camera. Ensure your drone batteries are fully charged, and your controller has sufficient signal strength. For camera settings, shooting in RAW format is highly recommended.
This gives you the most flexibility in post-processing to adjust exposure, white balance, and color without losing image quality.
Experiment with your camera's metering mode. Evaluative or matrix metering often works well for overall scene balance. Consider using aperture priority mode if available, and set your aperture to f/8 or f/11 for good depth of field, ensuring both the foreground property and background details are sharp.
As per manufacturer specifications for many professional camera drones, setting ISO as low as possible (e.g., ISO 100) will yield the cleanest images with minimal noise.
In-Flight Composition and Capturing the Shot
As you begin your flight, don't rush to snap pictures. Take time to scout different angles and altitudes. Start with wider shots to establish the property's context within its surroundings, then move in for closer views of architectural details.
Pay attention to how the light is interacting with the property's surfaces.
If shadows are too harsh, try moving the drone slightly higher or changing your angle to catch more light on those areas. If the light is too flat, wait for the sun to shift slightly. The goal is to compose shots that are both aesthetically pleasing and informative, accurately representing the property's features and scale.
Remember to capture multiple shots of key angles as the light subtly changes.
Post-Flight Editing for Enhanced Visuals
After your flight, the work isn't entirely done. Post-processing is where you can truly enhance the images captured during the optimal lighting conditions. Software like Adobe Lightroom or Capture One allows you to fine-tune exposure, contrast, white balance, and saturation.
When editing, aim for natural-looking enhancements that accurately reflect the property's appearance during the golden hour. Avoid over-editing, which can make the images look artificial. Focus on bringing out the warmth of the golden hour light, ensuring true-to-life colors, and sharpening details without introducing noise.
The objective is to present the property in its best possible light, making it as attractive as possible to potential buyers.
Drone Photography vs. Traditional Photography for Real Estate
Choosing the right photography method is crucial for effective real estate marketing. Both traditional ground-level photography and drone aerial photography have their strengths, and understanding these differences helps you decide which approach, or combination, best suits a particular property and marketing goal.
Traditional photography has been the standard for decades. It excels at showcasing interior spaces and details of a home's facade up close. However, it can struggle to convey the property's overall scale, its relationship to the neighborhood, or the full extent of its grounds.
- Ground Photography:
- Pros: Excellent for interior shots, detailed close-ups of architectural features, and easier for very small properties or tight urban lots.
- Cons: Limited ability to show property size, lot features, surrounding amenities, or neighborhood context. Can miss the "wow" factor of an aerial view.
When is Traditional Photography Best?
Traditional photography is ideal for smaller homes, condos, or townhouses where lot size and surrounding context are less critical. It's also essential for showcasing interior design, finishes, and the "lived-in" feel of a home. A skilled photographer can use wide-angle lenses to make rooms appear larger, and strategic lighting can highlight key selling points.
Why Drone Photography Wins for Scale and Context
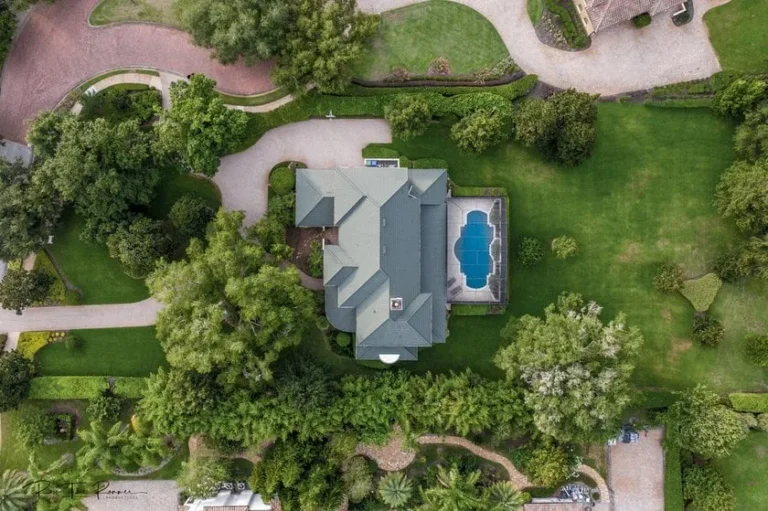
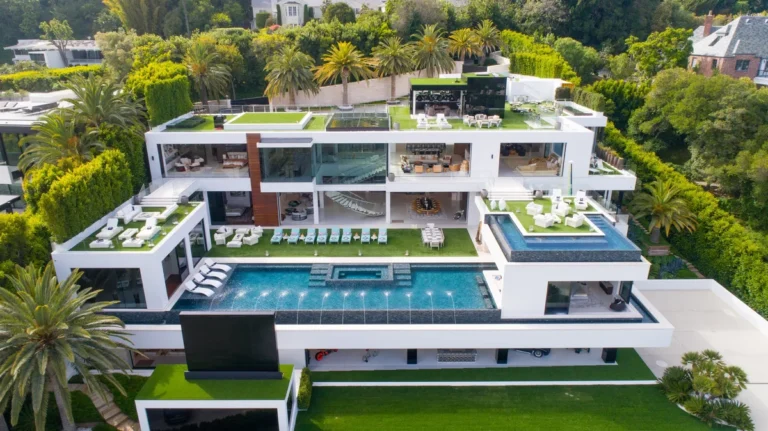
Drone photography fundamentally changes how a property is perceived. It provides an elevated perspective that ground-level shots simply cannot replicate. This elevated view is invaluable for properties with significant acreage, unique landscaping, swimming pools, or those situated in desirable locations with scenic views.
It allows potential buyers to instantly grasp the property's footprint, its boundaries, and its integration with the surrounding environment. This is particularly important for luxury homes, large estates, or properties where outdoor living space is a major selling point. For example, seeing a large, manicured backyard or a property adjacent to a park or waterfront provides immediate context that ground photos miss.
Combining Approaches for Maximum Impact
Often, the most effective real estate marketing strategy involves a blend of both traditional and drone photography. Use ground-level shots to draw buyers in with interior details and curb appeal, then use drone shots to showcase the property's grandeur, land, and prime location. This multimodal approach offers a comprehensive visual narrative.
Many real estate agents find that offering a package including both interior and exterior drone photography yields the best engagement. This ensures all aspects of the property are presented professionally and attractively, catering to a wider range of buyer preferences and providing them with a complete picture before they even visit in person.
Frequently Asked Questions About Drone Photography Timing
When is the absolute best time of day for real estate drone photography?
The best time is during the "golden hour," which is the period of soft, warm light about one hour after sunrise and one hour before sunset. This light minimizes harsh shadows and glare, making properties look their most appealing.
Can I still get good drone photos on a cloudy day?
Yes, you can. Overcast days provide diffused, even light that reduces glare and deep shadows. However, the images might appear flatter, lacking the depth and warmth that direct sunlight, even if soft, can provide.
It's still better than harsh midday sun.
What about shooting at night with drone lights?
While professional cinematography uses specialized lighting for night shoots, most real estate drone photography relies on natural light. Using drone lights for property exteriors can be complex, expensive, and may not yield realistic or appealing results compared to well-timed daytime shots. Blue hour offers a better atmospheric alternative if artificial light is on.
How does the season affect the best time for drone photography?
Seasons change the angle and duration of sunlight. In summer, the sun is higher and sets later, making golden hour shorter and potentially hotter. In winter, the sun is lower, and golden hour can last longer but might be accompanied by more dramatic temperature shifts and weather changes.
Always check specific sunrise/sunset times for your location and season.
Does drone photography timing differ for residential versus commercial properties?
The core principles of using natural light remain the same for both. However, commercial properties might have different architectural features or environmental contexts (like cityscapes) that could make blue hour or even twilight photography particularly effective for showcasing unique aspects after business hours.